Queen Rearing Basics
Notes from Improvers meeting held at the Bee Shed on Sunday 26th June 2022. First off, we studied the basics of queen rearing, followed by an explanation of the Cupkit/Jenter method of queen rearing. An apiary demonstration followed, as the breeder queen was restricted in the cup cage. Participants also had the opportunity to practice ‘queen’ marking and clipping using drones from the colony.
Three queen rearing responses by worker bees.
- Swarm queen cells
- Supercedure queen cells
- Emergency queen cells
We use the emergency response to rear our queens because:
- We can choose which hive the eggs/larvae come from.
- We can choose which hive the cells are reared in.
- We can choose when we carry out queen rearing.
- To some degree we can choose which drones will mate with the new queen.
The Basic Requirements are:
- Choose the eggs or one day old larvae from your ‘best’ hive(s) (the breeder queen colony).
- Rear your queen cells in a strong colony, (the cell builder colony), with lots of young bees, lots of honey and lots of pollen.
- The cell raiser should be queenless OR the queen should be separated from the cell raising part of the hive.
Why one day old larvae?
- Because the best queens are produced from very young larvae.
- Larva should be the size of a comma on the printed page.
- Using a larva over two days old, the queen will be inferior or useless because she does not get enough of the high protein, high carbohydrate royal jelly to switch the hormone system to produce a sexually mature female bee.
How do the worker bees choose which cells to develop?
Queen cells have to hang down:
- On a vertical comb we can use the edge (Miller method).
- On a horizontal comb the cells are vertical (Hopkins method).
- On a vertical comb we can remove the lower cell walls so the workers have space to build a long cell downwards (Ben Harden method).
Simple Experiment: Cut out a small piece of comb with eggs, scrape away excess cells and place horizontally over a super with a gap of approximately 3cm. Why might this produce queen cells?
The Cupkit or Jenter method of queen rearing
Cupkit (aka Nicot after the name of the French manufacturer) and Jenter are two differnt manufacturers of queen rearing equipment that both work on the same principal. There are other brands too.
Overview:
- The queen of your breeder colony is contained inside a box comprised of a matrix of cups sized like natural bee cells. After a few days these cups will contain eggs.
- The egg-filled cups are then inserted into plastic holders hanging vertically in a separate frame.
- This frame and eggs can then be introduced into your cell builder colony where the workers will create queen cells as the eggs hatch into larvae.
- When the queen cells are ripe, they will be ready for distribution.
The breeder colony
- Get the eggs from your best colony.
- Allow the plastic kit to acquire the hive odour for up to several weeks before placing the queen into the cage, potentially allowing the colony to draw wax and the queen to lay into adjoining cells.
- When the cups have eggs, 1-4 days, release the queen back into her native colony and transfer the egg-filled cups to the frame you prepared earlier with cup holders.
The cell builder colony
- The cup holder frame is then placed in the cell builder colony which should ideally be queenless, with no eggs or larvae from which new queens could be produced.
- The bees in the builder colony will then adopt the eggs in your plastic cells to make queens.
- When the queen cells are about 14 days old, they can be distributed to mini-nucs, standard nucs or colonies requiring re-queening. If that is inconvenient, queens can be allowed to emerge into a cell protector, a push-fit on the cell holder, where they can be fed by the workers.
Hints and Tips
Once eggs have been adopted as future queens they can be put into any strong colony for the raising period, even the (possibly bad-tempered) one you intend to re-queen. The genes will come from the breeder queen but the work of raising new queens can be provided by any colony.
As the breeder queen deposits the eggs in the plastic cell cups naturally, no grafting is required.
When transferring the egg-filled cups to the cell bar work quickly out of the sun to avoid desiccation.
If moving between apiaries the whole apparatus can be put into a nucleus box with frames of other bees from any colony to look after the eggs while in transit.
Tweezers are useful to lift out each cup and mount it on the cell bar frame.
You need good light to ensure each cell you transfer is equipped with an egg or very young larva.
As the Nicot/Cupkit or Jenter cages will accommodate many dozen cups you may wish to part-load the cage to avoid over-production of wasted eggs and cell cups.
As with all queen-rearing you need a strict timetable for each stage and the final placement of the outputs, with kit and colonies ready to take their part. Gestation and development periods are inflexible once begun.
Once you have got your kit, stick to it. While the principles governing their operation are the same, each manufacturer’s components are incompatible with others.
Miller method of Queen Rearing
You will require:
- A breeder colony.
- A cell builder colony.
- A mating nucleus or recipient colony for each queen cell.
Overview:
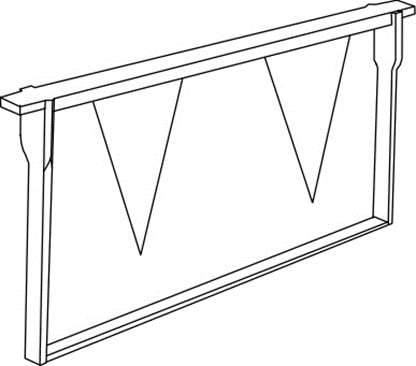
- Prepare a special frame with ‘starter’ triangles of foundation.
- Place this frame in your breeder colony.
- When this starter foundation is filled with young brood with an outer margin of eggs, trim away the eggs and place the frame in the middle of a strong colony from which the queen has been removed. In about 10 days sealed queen cells are ready to distribute.
The ‘starter’ frame and breeder colony:
- Two or three triangles of foundation are attached to the top bar with the point hanging down. Leave sufficient space all round for queen cells to be built along the free edges.
- Place the ‘starter’ frame in your breeder colony. In order to avoid the frame being filled with drone brood it may be necessary to temporarily remove all but two of the frames of brood and place the ‘starter’ frame between them.
The cell builder colony:
- The cell builder colony should be queenless and ideally with no eggs or larvae that are young enough to be converted into queen cells.
- With a sharp knife trim the ‘starter’ strips back to one day old larvae.
- Place the frame in the middle of the cell builder colony. After 10 days the queen cells will be sealed and ready for distribution to re-queen other colonies or make up mating nuclei.
Hopkins method of Queen Rearing
You will require:
- A breeder colony.
- A cell builder colony.
- A mating nucleus or recipient colony for each queen cell.
Overview:
- Take a frame of eggs or newly hatched larvae from your selected breeder colony.
- Give this frame to a queenless cell builder colony, placed horizontally above the brood nest.
- The nurse bees will realise they are queenless and will be stimulated to feed these larvae with copious quantities of royal jelly and convert them from worker larvae to queen larvae.
Getting the eggs/young larvae:
- Remove a frame from the centre of the breeder colony brood nest and replace it with a clean drawn comb that the breeder queen can lay into.
- Leave for 3-4 days or until you have sufficient small larvae, preferably one day old larvae.
- Brush off the bees and prepare the surface of the best side. For each row of eggs/larvae that you wish to retain, the three rows either side should be destroyed to the midrib. Then on each retained row remove two cells and leave the third intact. Spacing the eggs/larvae out in this way avoids closely bunched queen cells that are difficult to separate without damage.
Preparing the cell builder colony:
- The cell builder colony should be queenless and ideally with no eggs or larvae that are young enough to be converted into queen cells.
- Place the prepared frame over the brood nest horizontally, prepared face down, resting on a frame or blocks to leave 3-4cm between comb surface and top bars of frames below.
- Place an eke over the frame, replace crown board (some people put a cloth under the board to stop draughts) and replace the roof.
- The queen cells should be cut out two days before hatching (day 14 from newly laid egg, or approximately 10 days after setting up the frame in the cell builder). The cells can be placed in colonies needing re-queening or into mating nuclei.
Ben Harden method of Queen Rearing
You will require:
- A breeder colony, preferably with one or two supers.
- A second brood box.
- A mating nucleus or recipient colony for each queen cell.
Overview:
- Two frames with eggs/one day old larvae are removed from the brood box of the breeder colony and are placed above the supers in the spare brood box together with four other frames of pollen and honey.
- The space in the top brood box is filled with suitable material to stop wild comb building.
- Because of the separation from the queen the nurse bees will behave as if they are queenless and will be stimulated to feed these larvae with copious quantities of royal jelly and convert them from worker larvae to queen larvae.
- After 7 days the queen cells can be removed. The two frames with brood can be swapped for two fresh ones from below to repeat the cycle throughout the season.
Setting up the combined breeder/cell builder colony:
- Remove the two frames with eggs/larvae from the breeder colony brood nest MAKING SURE THE QUEEN IS NOT ON EITHER OF THEM.
- Close the gaps and add fresh comb to the outside. Rebuild the hive with queen excluder and supers.
- Make up the top box with six frames. The two brood frames in the centre, pollen frames either side and honey frames on the outside. Fill the empty space. Replace crown board and roof.
Manipulating the queen rearing colony:
- Every seven days throughout the season transfer two frames with suitable eggs/young larvae from the bottom to the top, and two empty frames to the bottom, having checked for and removed the queen cells.
- Always find the queen first before removing frames.
- Always ensure there are adequate amounts of pollen and honey in the top box.
Variation on this theme:
In order to improve the likelihood of queen cells being produced, select a one day old larva and carefully remove the cell walls below it. Also clear other cells below the selected cell for 3-4cm. Repeat this operation spacing the selected cells across the comb.
Queen Rearing Basics Part 2
Having produced your queen cells you will need a colony to place them in, where the emerging queens are free to mate.
Mating nucleus colonies:
- Normally 3-6 frames.
- Require frame(s) of brood, frame(s) of pollen, frame(s) of stores, space to expand.
- The nucleus will have one ‘ripe’ queen cell introduced from your cell builder colony.
- The nucleus should preferably be in a good mating area.
Methods of cutting out and installing ‘ripe’ queen cells:
- Drawing pin, paper clip, foundation wire, etc.
- Aluminium foil.
Mini-nucs:
Ron Brown, a Devon Beekeeper, used them a lot.
Procedure for Filling Mini-nucs:
- Prepare the mini-nuc frames with foundation and install. Close the sliding entrance. Supply the mini-nuc with fondant feed.
- Place the mini-nucs upside down in an upturned hive roof. Slide the base out far enough to pour bees in.
- Shake the bees from a super frame into a washing up bowl and spray them lightly with water. Repeat with a further two frames.
- Shake the wet bees to a compact mass and carefully scoop a cup full. Immediately tip this into the upturned mini-nuc and close the base.
- Turn the mini-nuc the right way up and install the ‘ripe’ queen cell.
- Leave the mini-nuc closed in a cool, dark place for a few days. May need water spray occasionally.
- Put the nuc in the open and open the entrance slide.
You will now hopefully have about 300 bees drawing out wax comb and a ‘ripe’ queen cell that will hatch in a few days time. It is important to monitor these small hives and to maintain the supply of moisture while they are shut in. When released, never let the supply of fondant run out. There should always be sufficient to see the colony through a cold spell.
Hints and tips:
- Put a brick on the hive to stop it blowing away.
- Prop the sliding entrance open with a piece of wood otherwise the slides sometimes close by themselves with disastrous consequences.
- When the queen is mated and laying well she is ready to transfer to a bigger nuc or hive.
- If/when Asian hornets arrive in our area this type of colony will be extremely vulnerable to predation.