Improvers Day 2023

Nucs: making, managing, using. A talk and hands-on demo to improve your beekeeping skills.
John Badley and Nick Silver take you through the selection of nucleus hives you are likely to see in this part of the world, followed by an appreciation of the basic considerations when making up a nuc colony.
This will be followed by a description of the nuc making process plus some variations on this theme.
Finally the participants will put nucs together under the watchful eye of the tutors. There will be time for questions, as well as tea and cakes!
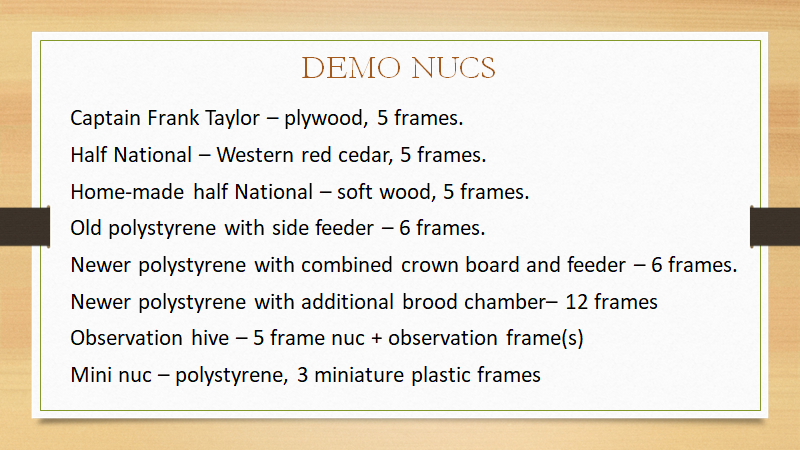
These eight types of nuc represent both old and new designs. The Taylor nuc is mentioned as Frank Taylor lived in the area and there may still be some of these to be found second hand. They are small, light and handy for catching swarms but not recommended for overwintering colonies as the plywood is thin.
The western red cedar National nuc is the standard 5 frame hive sold by most bee equipment suppliers. The home-made soft wood version would be a fraction of the cost and is easy to make.
The old-style poly nuc had a feeder trough on one side and was prone to drowning bees.
The newer poly nucs have a combined crown board and feeder which is more versatile. They can also be supplied with additional brood boxes. Nick explained the various scenarios for overwintering nucs in these hives.
5 frame nucs used as an observation hive offer a good way to demonstrate bees to the public. It is essential to consider health and safety measures for the public and survival issues for the bees.
The 3 frame mini nuc has been included to emphasise the small number of bees in this type of hive. Less experienced beekeepers are recommended to use the larger 5 and 6 frame nucs which have far fewer problems with starving, absconding and over crowding.
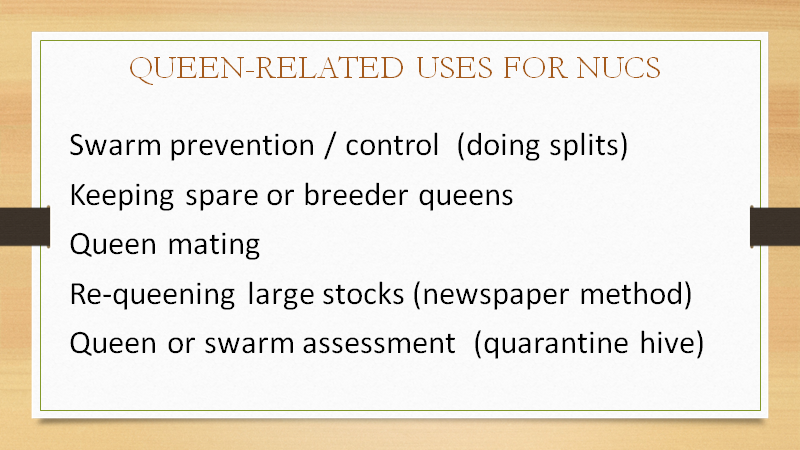
The five uses for nucs listed above are all queen-related. Comments are: breeder queens will survive longer in a nucleus colony as opposed to a full hive; queen mating requires a hopelessly queenless colony into which the new queen cells are placed; re-queening large stocks – see later; quarentine hives/apiaries should be considered for all swarms and hives that are moved from one area to another.
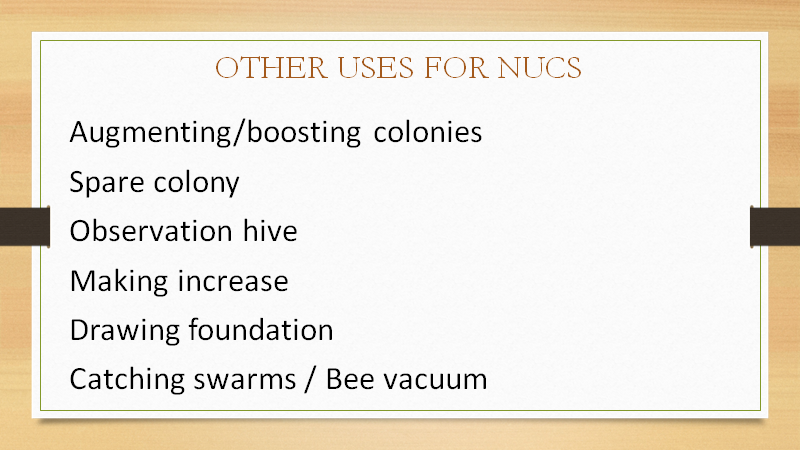
Other uses for nucs are listed on the slide and are largely self explanatory.
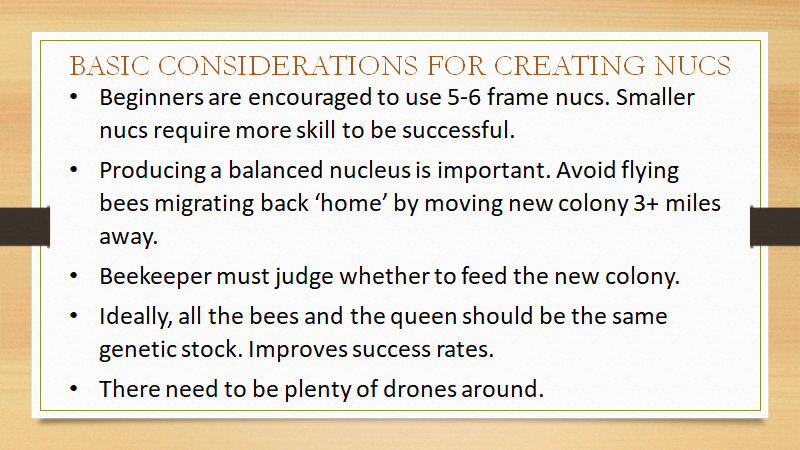
When making up nucs, the importance of a balanced colony cannot be over stressed. Allowing flying bees to migrate back to the donor hive leaves the nuc with no foragers, causing a dearth of fresh pollen and nectar when most needed. The imbalance will be corrected eventually but the delay slows down the development of the nucleus colony.
Don’t start colony manipulations too early in the year. There need to be plenty of drones around for successful mating.
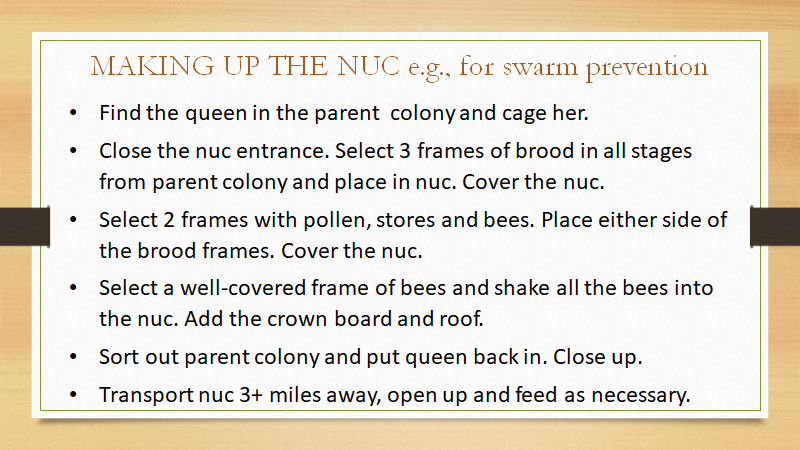
This method can be used for proactive swarm prevention but there are many variations to suit your needs. You require a well stocked parent colony, a nuc box and spare frames of foundation. This is what you will be doing in the apiary.
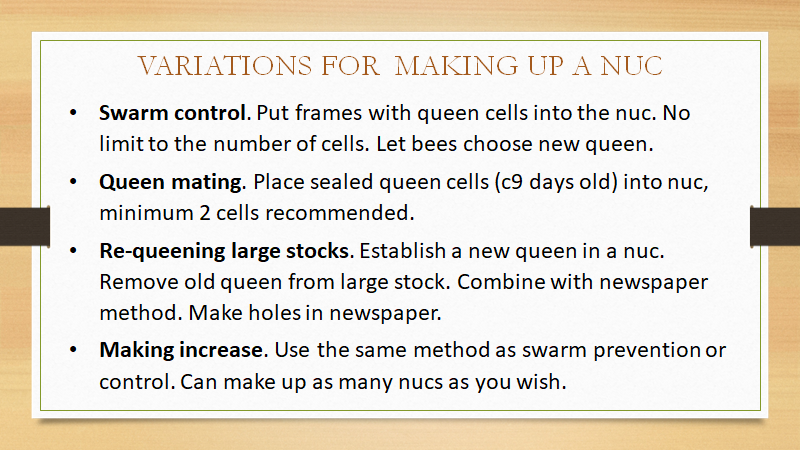
Instead of swarm prevention you may need to use a nuc for swarm control, in which case put frames with queen cells into the nuc and remove queen cells from the donor colony.
Queen mating requires the nuc to be unable to produce new queen cells so make sure brood is sealed. Then you can add the new queen cells from your cell raising colony. The day 9 recommendation means they are less likely to be damaged during transfer.
It is often difficult to re-queen large or aggressive stocks. This method surrounds the new queen with her own kind who will protect her from aggression until her pheromones are spread around the colony.
Making increase is like swarm prevention or swarm control but you can make up as many nucs as you like.
Discussion
When using nucs for swarm prevention, do you put the old queen back into the original hive or into the nuc? Some people say that putting the old queen into the nuc and moving it away 3+ miles is the nearest you will get to emulating a natural swarm. You choose.
To summarise, nucs are an essential part of a beekeeper’s kit. They can be used for numerous purposes in a variety of ways to make your beekeeping easier and more productive.
Bee Myths, April ’23
What the Books Don’t Tell You and Why Bees Change Their Minds
A talk by Clare Densley, current Head of Bee Department at Buckfast Abbey, and former SBI Martin Hann.
Held at Kilmington Village Hall, 6th April 2023 (39 attendees)
As Beekeepers, where do we get our information from?
Clare and Martin pointed out that there is a huge amount of information available, especially on the internet, but how can you tell whether it is reliable or even relevant? So, to start the talk they pointed out a few sources they use which have proved to be useful.
In no particular order:
Dave Cushman’s site (dave-cushman.net), currently run by Roger Patterson, has a wide range of articles on all aspects of beekeeping.
Rusty Burlew (https://backyardbeekeeping.iamcountryside.com/author/rustyburlew/page/10/ ), is a well-known American bee writer and lecturer who has had a number of articles in the BBKA News magazine.
Beebase (https://nationalbeeunit.com ), recently re-vamped with a search facility to help you find what you are looking for.

Dr Alison McAfee (https://alisonmcafeeblogs.wordpress.com). Based in British Columbia, Canada, Alison is a researcher and blogger on bees.
Statements we all take for granted which may not always be true.
It is not that bees are awkward or deliberately trying to confuse us humans, we just have to remember that they are a very flexible species and what they do is not set in stone. Perhaps we have to be a little bit more flexible to understand them.
If pollen is going into the hive, then all is well
This is the sort of statement we hear all the time and probably preach to beginners. In reality, the amount of pollen going into a hive is a function of queen pheromone, specifically queen mandibular pheromone. This pheromone is produced almost continuously within the colony so it is not surprising that pollen collection occurs when the weather permits, but it is the quantity of pheromone that is the important factor. So, the statement perhaps ought to read ‘If pollen is going into the hive with gusto, then all is well’. Modest quantities of pollen collection may actually indicate the queen is not 5-star quality!
Bad tempered bees always bring in more honey
There is possibly a grain of truth in this statement in that a bad-tempered colony is likely to be left alone for much of the time. Every time the hive is opened for inspection it takes time and resources to restore equilibrium. The lack of disturbance will allow the bees to build stores as they wish. Apart from this aspect, Clare and Martin felt there are really no other reasons to equate bad temper with honey gathering. They advocate eliminating bad tempered bees.
The first virgin to hatch out kills all the other virgins
Just not true! We have to realise that the workers are in control of the situation, not the queen. If the workers want to have a primary swarm and follow that with one or more casts then they will prevent the first queen to emerge from harming other queens ‘in the pipeline’. Multiple casts are a way for the colony to ‘spread it’s genes around’. A primary swarm may be followed by five or six casts. This situation happens quite frequently and often results in the remaining colony dying out through lack of resources.
Colonies reared from swarm cells will produce swarmy bees
Our speakers went on to make some comments about using swarm cells for making increase. In their experience they had not noticed this statement to be particularly true. In fact, just the opposite. The workers will have chosen the larvae for the next generation, unlike grafting, where it is the beekeeper’s choice. Perfectly good queens can be raised by carefully removing the queen cells and placing in a mini nuc colony or removing a frame with the queen cell and placing in a standard nuc. They have also experimented with queen cell incubation.
Supersedure cells are always on the surface of the comb rather than at the edge
This statement should perhaps read ‘Supersedure cells are SOMETIMES on the surface…. The whole process is on a knife edge until the moment it happens, and it could go either way, supersedure or swarm. To improve your chances of a correct diagnosis, check for clues such as Have they got enough resources to swarm? How big is the colony? How many queen cells have been built?
Varroa always infest drone brood in preference to worker brood
This is the basis of the still-recommended drone brood removal method as part of IPM. In the laboratory it is true there is a marked preference, but in the hive the situation is far from a simple lab experiment. The mated, female mite clings to the body of a worker and is transported around the hive. The pheromones given off by the larvae attract the mite and if she happens to pass over a suitable cell which is about to be capped the chances are she will drop into that cell. Inspecting only drone brood for varroa mites may give a false impression of varroa infestation.
Before the swarm departs the queen is slimmed down so she can fly
Don’t bet on it! Our duo spoke of colonies with eggs and sealed queen cells present that had swarmed which would not happen if the queen had stopped being fed for several days to slim down. Instead, the swarm will emerge anyway, hang up in a bush close to the old hive and wait for the queen to slim so she can fly to the new site. It is also possible for a swarm to move in several hops with rests before reaching their new home.
A prime swarm leaves when the first queen cell is sealed
To improve success rates bees prefer to swarm when the weather is fine. A sudden change in weather will often make them change their minds, and they may even pull sealed queen cells down.
All the bees in the colony love the queen
This is only true for the young bees who attend the queen’s court. The rest of the colony have to get on with their jobs, including leaving the hive to forage. However, all the bees will be aware as soon as the queen is no longer present, initiating the emergency swarm cell response.
Foragers show flower constancy
Mostly true, but not always. You can see this for yourself if you watch bees in your garden long enough. It is instructive to compare honeybee foraging behaviour with bumble bee foraging behaviour.
Odd things which happen which aren’t in any of the books
Snails in the hive being embalmed. Queens that have missed the entrance on return from mating and are forming a colony under the mesh floor. Or perhaps a swarm that has left without the queen. Odd things happen quite a lot!
Usurpation swarms (sometimes called parasitic swarms)
This situation occurs when a swarm tries to take over another, usually weak, colony. Our speakers were adamant that it occurs quite often, especially if there is a shortage of suitable nesting sites in the area.
A colony with a virgin queen will fill up with drones
Many of you will have observed this phenomenon. The drones are attracted by the virgin’s pheromones as she takes her orientation flights and will accompany her to the drone congregation area. It depends how many colonies with drones there are in the surrounding area.
In conclusion, most of bee behaviour is about chemical signals. All parts of the hive give off pheromones, initiating responses which make sense to the bees but are obscure to us. We also have to recognise that bees have not evolved to be a perfect super organism.
Question time:
Q. How far away should I place bait hives?
A. The usual figure is ¼ to ½ a mile. Martin described experiments with a piece of board with wax on the surface hung near the apiary to attract the initial swarm. Collecting the swarm is a simple matter of shaking the cluster into a skep or box.
Q. What are the conditions for incubating queen cells?
A. Use an egg incubator at 34°C. Put the cells in a cage with a small quantity of food such as candipoline. The cage can be laid horizontally after day 13. The queens do not need attendants but MUST be dealt with in a few hours.
Val thanked our speakers for a fascinating insight to bee behaviour and ideas that we might use to improve our beekeeping.
Gardening for Bees Mar ’23
‘Gardening in Balance with Nature’
A talk by David Robinson, MD of National Beekeeping Supplies
Held at Kilmington Village Hall, 2nd March, 2023. 26 attendees
David has had an interest in the environment and natural world since his upbringing in Birmingham near Spaghetti Junction. He went on to graduate from the UK’s first Environmental Biology course at the University of Liverpool in 1976. In 2011, he joined Suttons Seeds as marketing director and in 2014 he and a colleague organised a management buyout from their French owners with David becoming Managing Director. They acquired several gardening/wildlife and direct marketing related businesses, including National Bee Supplies and ran the catalogue/online trading business of the Garden Organic charity, of which he is a trustee. Having sold Suttons Seeds, David is now able to concentrate on his passion for organic gardening. He writes a monthly gardening article for Bee Craft.
The theme of the talk, ‘Gardening in balance with nature’, aims to show how gardening can be a sustainable activity, contributing to UK biodiversity. This talk is about supporting the 24 UK species of bumblebee, 59 species of butterflies, 225 species of solitary bees, over 9000 species of wasp and many thousands of other insects including hoverflies and beetles.
Why do insects need plants?
Take the case of docks. They are the thugs of the plant world. They will invade and take over areas of your garden, their spreading foliage crowding out other plants. However, given time, the dock beetle will find and invade the docks, laying their eggs, which in turn hatch out into caterpillars that eat the leaves. Using pesticides in your garden will kill these useful species as well as the intended target species.
David showed a similar relationship between Southern beech seedlings and leaf cutter bees. In this case the bees are using the leaf material for making their nests. A similar situation can be observed with rose leaves. The plants don’t suffer too much and the bees add to the biodiversity of your garden.
Wasps are often seen as a ‘pest’ species, but in fact, they are a very important part of the balance of nature. As a carnivorous insect the adults eating an enormous number of pests in the UK each year.
Which came first, the flower or the bee?
The flowering plants started to evolve around 180m years ago. At that time there were a few insects, but from then on, the insects and flowering plants evolved together producing the fantastic variety of species and special relationships which we call biodiversity. Some flowering plants offered a sugary reward (nectar) to attract the bees which would then inadvertently carry pollen from flower to flower, bringing about cross pollination.
The pollinators we don’t see
Studies have shown that as many as 45% of nocturnal moths carry pollen on their bodies.
Flowers don’t have to be showy
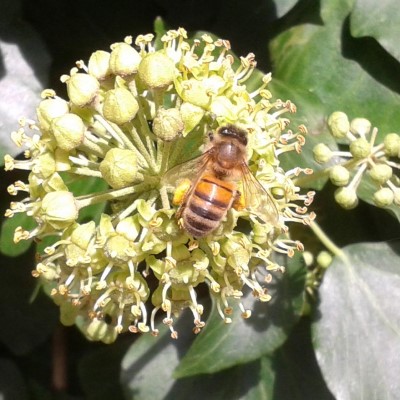 Ivy
Ivy
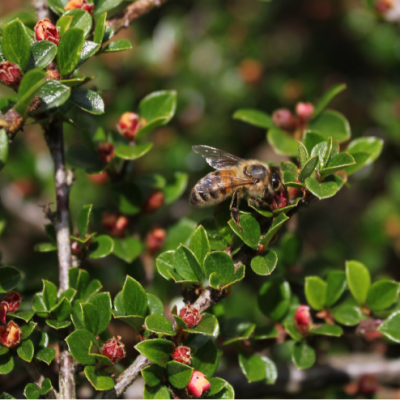 Cotoneaster
These two flowers attract numerous bees, flies, wasps and other pollinators, despite being drab.
Shape matters
Choose varieties with easily available pollen. Avoid double flowered varieties.
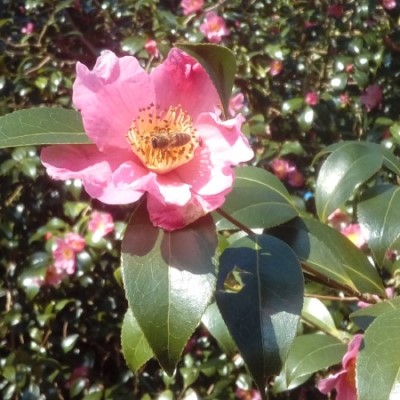 Single Camellia
 Double Camellia
Have a variety of formats to cater for all types of bee.
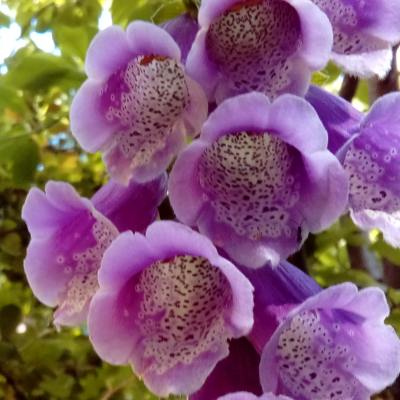 Foxglove
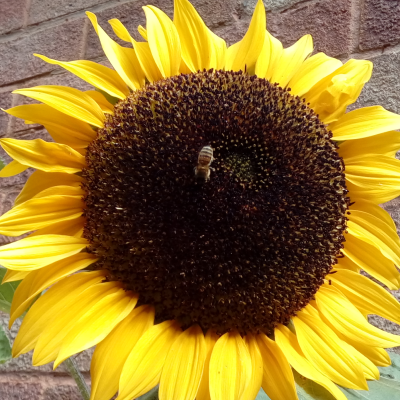 Sunflower
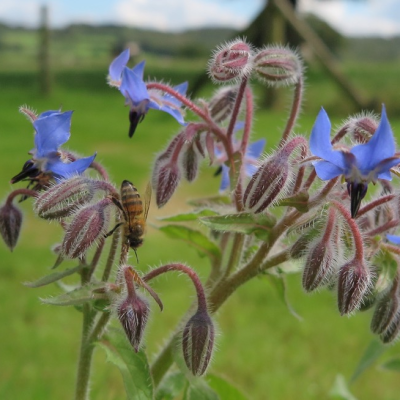 Borage
Let some of your veggies flower and run to seed. Brassica flowers are similar to oil seed rape. Brilliant for bees!
Should we go native?
We also need a wide variety of plants in our gardens to attract as many species of insect as possible, e.g., flowers for long-tongued and short-tongued bees. Gardens occupy over 1,000,000 acres in the UK, and many of the species planted in gardens are non-native. Although ‘non-native’ has a bad name, the vast majority of non-native flowering plants are not invasive and are beneficial to wildlife as they compensate for the wild plants that are no longer abundant, for example Elaeagnus often used for hedging (Elaeagnus umbellata).
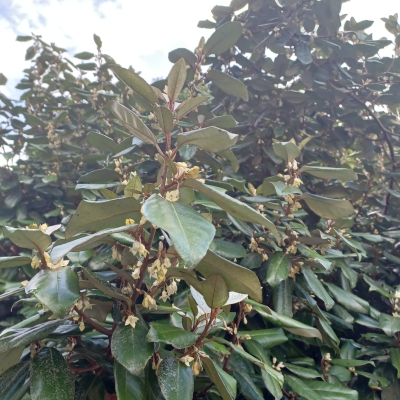 Elaeagnus
The Year
David’s favourite plants to provide pollen and/or nectar throughout the year.
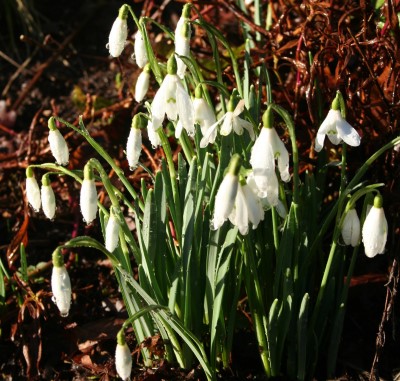 January – Snowdrops
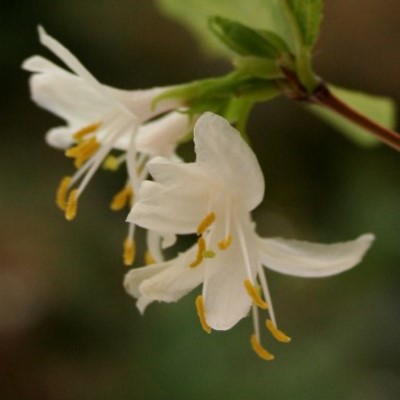 February – Winter honeysuckle – Lonicera fragrans
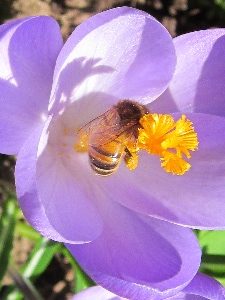 March – Crocus
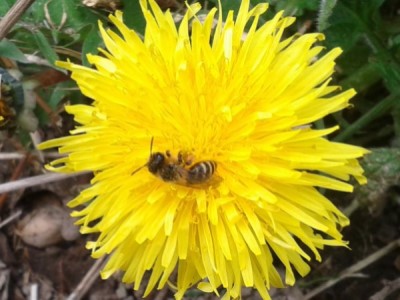 April – Dandelion
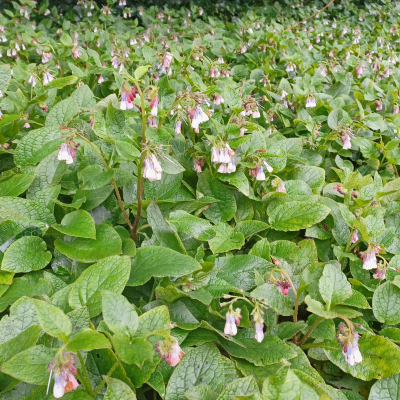 May – Comfrey
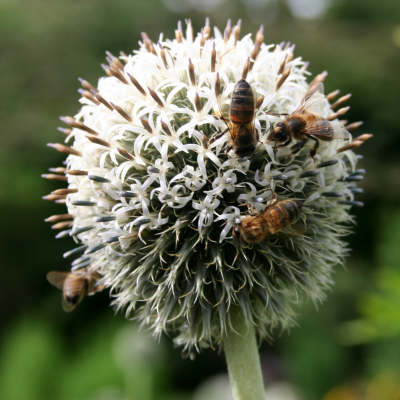 June – Bristol onion
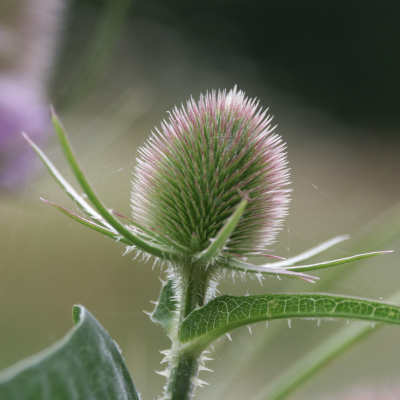 July – Teasels
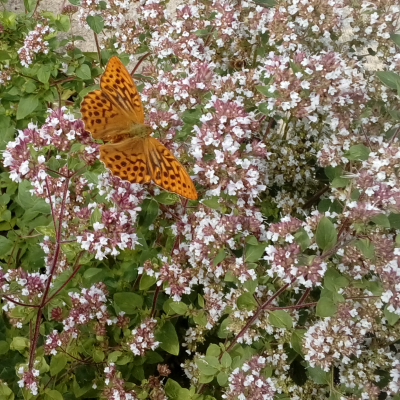 August – Marjoram and other herbs
 September – Mexican daisy Erigeron karvinskyanus
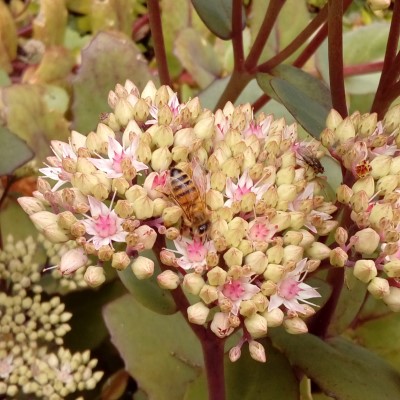 October – Sedum
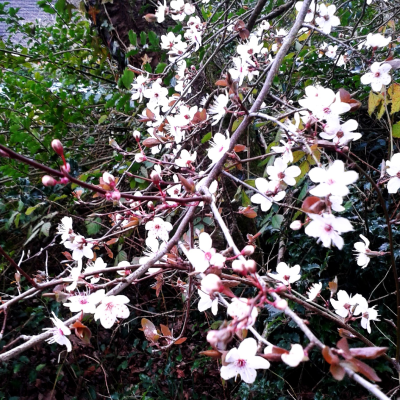 November – Winter flowering cherry Prunus subhirtella autumnalis
 December – Mahonia
Do more by doing less – No Mow May
By allowing grass to grow taller, the grass roots will penetrate deeper into the soil, lowering temperatures in the sward and reducing run off. This will allow seeds to germinate, grow and set seed for next year, improving biodiversity for free! Plants such as clover are particularly good at regeneration after mowing (see below).
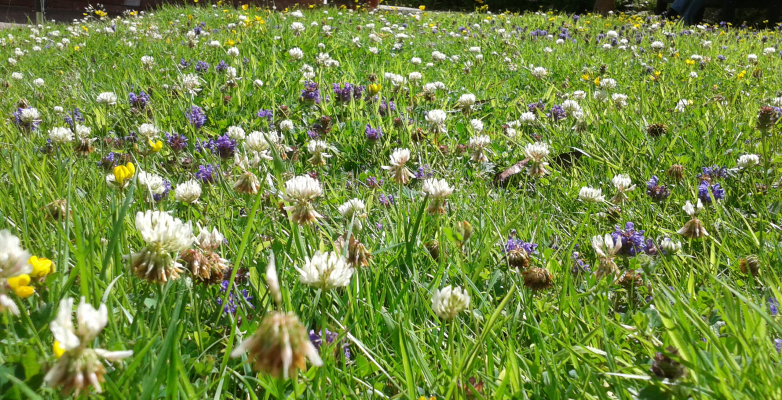 No-mow-May
Trees
National Beekeeping Supplies have planted 3500 so far and have achieved their aim of becoming ‘carbon negative’. They are experimenting with a close planting system called ‘Mini Forests’ which originated in Japan. A new area is planted each year with a mulch of grass cuttings from hay meadows and paths of wood chips from hive manufacture.
The Miyawaki Mini Forest method mimics the way a forest would recolonise itself if humans stepped away. The tree species chosen must grow well in the region planted. The target is 600 trees planted in a tennis court sized area. These Mini Forests are ideally suited for urban areas. For more information visit the Earth Watch site.
In addition to the meadows and tree planting, NBS have created eight ponds of differing sizes and depth to provide new habitats for wildlife and carbon capture.
Trees have the advantage that, when they are out in flower, there is a massive amount of pollen and nectar in a small area. The bees don’t have to go far to collect as much as they want.
The audience had lots of questions, ranging from effects of climate change to details of the Miyawaki Forest system, all competently answered by David. We thank him for a fascinating insight into his endeavours to make NBS ‘carbon negative’ and provide so many hints and tips as to how we can all improve our gardening for nature.
Queenright queen rearing, 02/02/23
Queenright Queen Rearing Using the Ben Harden System
A talk via Zoom by David Evans
Presented as the joint winter meeting of West Dorset and East Devon branches by Somerset Beekeepers via the Eventbrite portal. 396 attendees.
David Evans has been keeping bees for 15 years. He was formally Professor of Virology at the University of St Andrews where he worked on control of honey bee viruses (DWV and CBPV). He currently runs c20 colonies and is interested in queen rearing and stock improvement. He is a member of Lochaber BKA at Ardnamurchan on the west coast of Scotland, where the bees are currently Varroa-free.
This talk aims to help explain ‘active’ queen rearing and introduce the basic conditions under which new queens are produced in the colony. Along the way David will describe the small amount of specialised kit needed for grafting and discuss the use of nucleus colonies for queen mating. The talk is intended mainly for hobbyist beekeepers with a few years experience and 2-5 colonies.
Passive and active queen rearing
Passive queen rearing refers to situations such as re-queening during swarm control or using naturally produced swarm cells for increase in nucleus colonies. In these situations, the bees dictate the timing, provenance and quantity of new queens.
Active queen rearing allows the beekeeper to choose their best colony for donating larvae at a time that suits them. Docility, disease resistance, honey production, etc, can all be improved in this way.
David warned that there are hundreds of queen rearing methods described but cautions that, for beginners, it is desirable to learn one method well and avoid complicated techniques.
Queens reared in a normal hive
New queens are predominantly produced in the early part of the season, with plenty of drones available, a good nectar flow, and possibly a crowded colony with an aging queen. Under these conditions the queen mandibular and footprint pheromones will be reduced. The aim of the Ben Harden method is to reproduce these conditions.
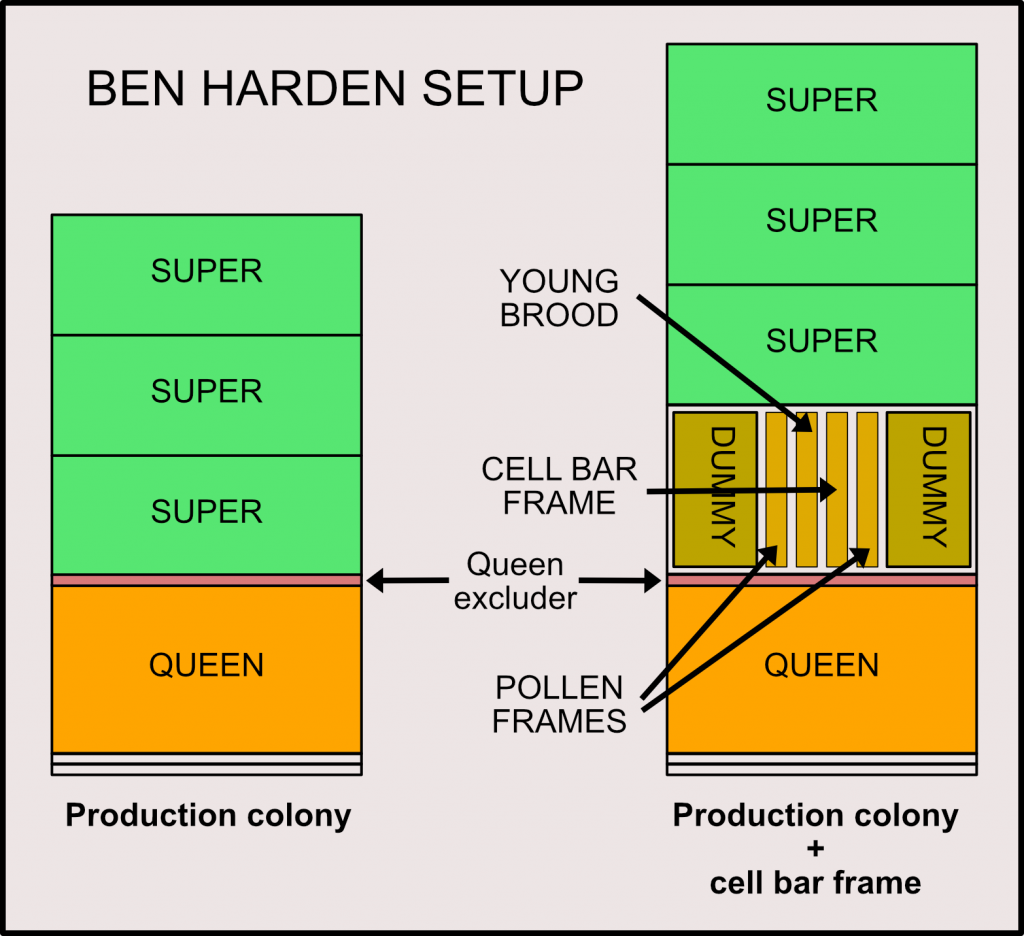
The Ben Harden method
With queenright queen rearing the queen is present throughout the operation. The method can be used with a single colony and a minimum of additional equipment. Thus, there are no interruptions of the honey flow and no significant colony manipulations. A similar method has been used by the National Bee Unit (see references at the end).
Overview
Prepare the colony by:
- Add a second brood box
- Reduce the volume of upper box
- Encourage lots of young bees into the upper box
- Add suitable larvae to the upper box
- Monitor queen cell development
- Remove queen cells when mature (14 days after egg laying)
David’s list of what you need
- A spare brood box
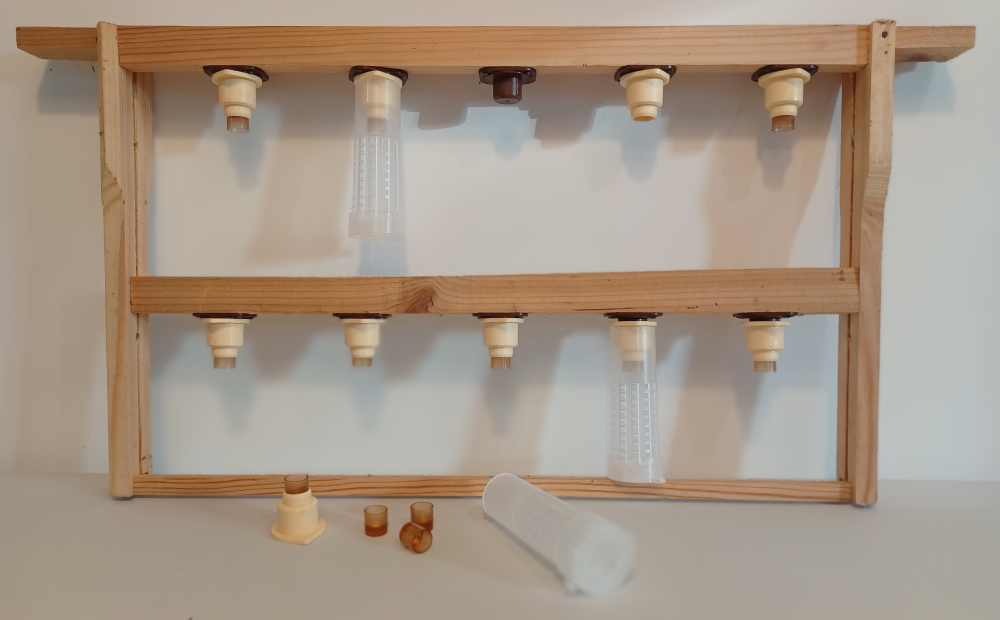
- Queen cups and a cell bar frame
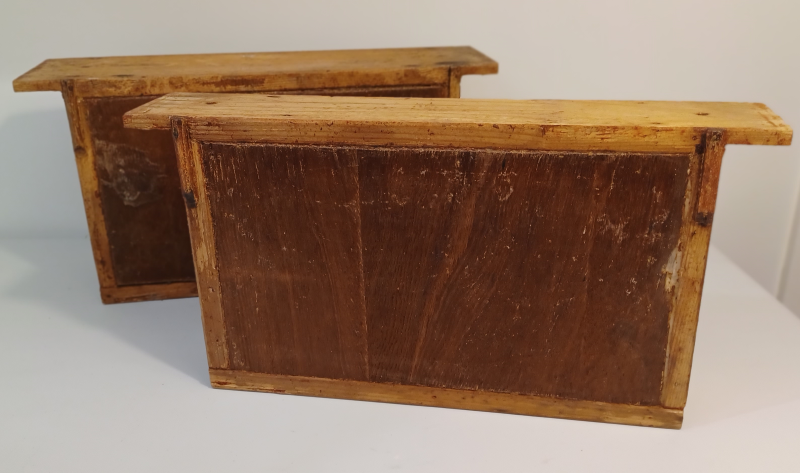
- Two fat dummies
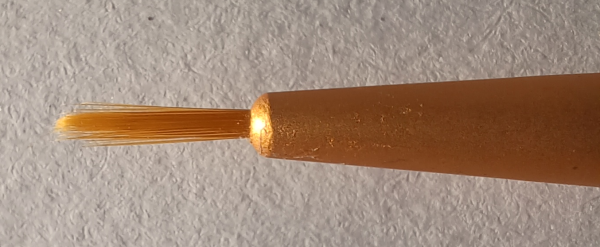
- A grafting tool (e.g., small paint brush)
- Nuc box(es) for queen mating
- Good eyesight
- Good weather
- Good record keeping (score traits desirable to you)
The ‘bad boys’
David advised culling drone brood from aggressive colonies where ever possible in the area.
Cell bar frame with the Nicot system of cell cups (David’s preferred way)
A cell bar frame is easily and cheaply made from a standard frame with additional cross bar(s) attached. To the cross bars pin the brown mount (using frame nails). The cream coloured cup holder is pressed onto the mount and a small brown cup pressed into the cup holder. When the new queen cells are capped, a plastic cage can be fitted over them to avoid the first queen to emerge killing all the other queens. It helps if the bottom bar can pivot for easy access.
Fat dummies
Easily made from correx plastic sheet cut to size and taped together or use old frame parts and thin plywood nailed together. The idea is to leave space in the top box for just 4 frames in the middle (see Ben Harden setup).
Grafting tool
You will be transferring 1 day old larvae from the donor hive frame to your cell bar frame. The larvae are about the size of an apostrophe. There are many different grafting tools you can buy, but the easiest for beginners to master is the 00 or 000 paint brush, usually with sable bristles. The soft bristles are far less likely to damage the larvae.

Hints and Tips
A head torch improves visibility and leaves your hands free.

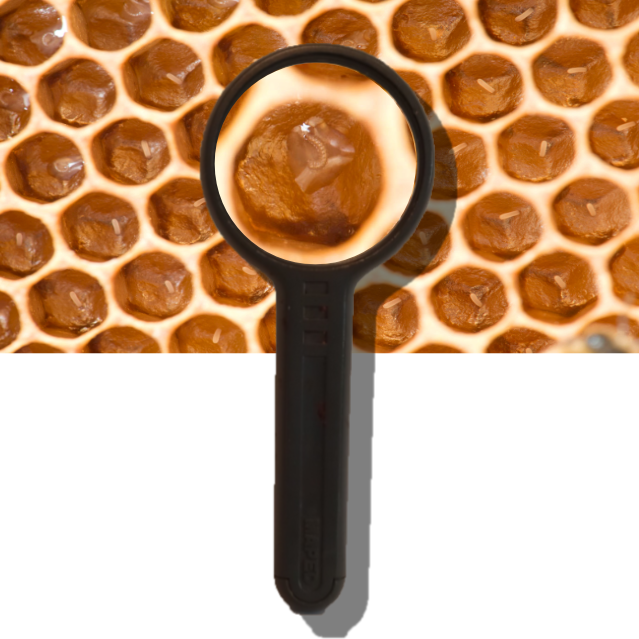
Make sure you can see the larvae. Use a magnifier if necessary.
Preparation and Planning Schedule
- Select the colonies for a) cell raising (quality irrelevant), and b) the larva source colony (quality important). These could be the same colony.
- 24-48 hours before grafting, set up the Ben Harden system to acclimatise the cell bar frame in the cell builder colony.
- Graft.
- Check for cell starting after 24 hours.
- ~10 days later use the new queen cells.
Grafting – It’s much easier than you think!
Before actually grafting, you MUST check the brood frames in the top box for queen cells. Destroy them all.
The general principles are to transfer very young larvae without damaging them, chilling them or allowing them to dry out. So, select larvae adjacent to eggs (likely to be very young larvae), and keep grafts warm and moist by covering with a damp cloth.
A quick check 1-2 days after grafting will show if you have been successful. If not, simply try again.
The queens will ideally have been grafted on day 4 from egg laying, in which case they will emerge on day 12 from grafting. Make sure the cages are in place before emergence.
Queen mating
As we all know, successful queen mating requires reasonable weather; warm, sunny and only a gentle breeze. Your options are to add a cell to a full sized colony, a nucleus colony or a mini-nuc. In all cases the recipient colony needs to be queenless. Which ever type of colony you use, they can be left alone for 2 weeks or more before checking for a laying queen.
David did not recommend beginners using mini-nucs as they require some skill to manage successfully.

To add your new queen cell to the hive or nuc, remove the cage and pull the cup holder from your cell bar frame. Gently press the cup holder and queen cell into a small depression on the face of the comb above emerging brood, and close up the hive. You need to be patient!
It’s as simple as that!
Further reading
A simple method of raising queen cells – Ben Harden, Nutshell #59, Northern Bee Books.
Rearing queen honey bees in a queenright colony – David Wilkinson and Mike Brown, American Bee Journal, January, 2002 (http://bit.ly/LrD4qJ )
Visit David’s website: www.theapiarist.org
Asian hornet threat, 12/01/23
The Asian hornet threat – Tales from Ascot, Jersey and Galicia
A talk to EDBK by Stephen Fleming, co-editor of Bee Craft
Thursday January 12th, 2023. 30+ attendees
Stephen has been keeping bees for 29 years and, as co-editor of Bee Craft, has travelled to many places to report on the depredations of the Asian hornet, the effects on our bees and what is being done to mitigate these effects.
Invasive species in Europe
To put things in perspective, the Asian hornet is only one of thousands of exotic species in Europe at the present time.

Vespa velutina
Vespa velutina nigrithorax, the Asian hornet, sometimes called the Yellow legged hornet, was accidentally imported into south west France from eastern China, sometime in 2003/2004. It is thought that a single fertilised female stowed away in a consignment of pottery. Once established, it quickly spread and was first sighted by Jean Haxaire on fruit at a market in Lot-et-Garonne , South West France, in 2004. By 2012 it had spread to most of the western parts of France as far north as Saint-Malo!
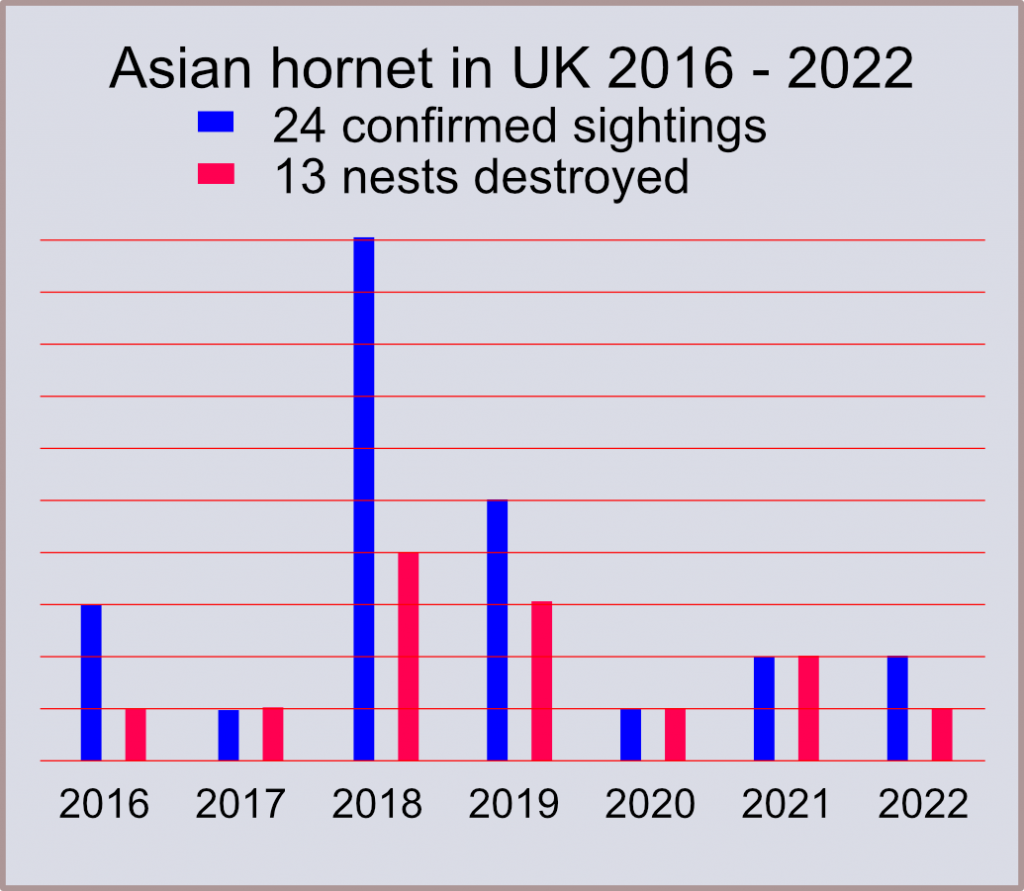
Jersey was invaded in August 2016 and the first confirmed sighting in the UK was at Tetbury in Gloucestershire in September the same year.
Life Cycle
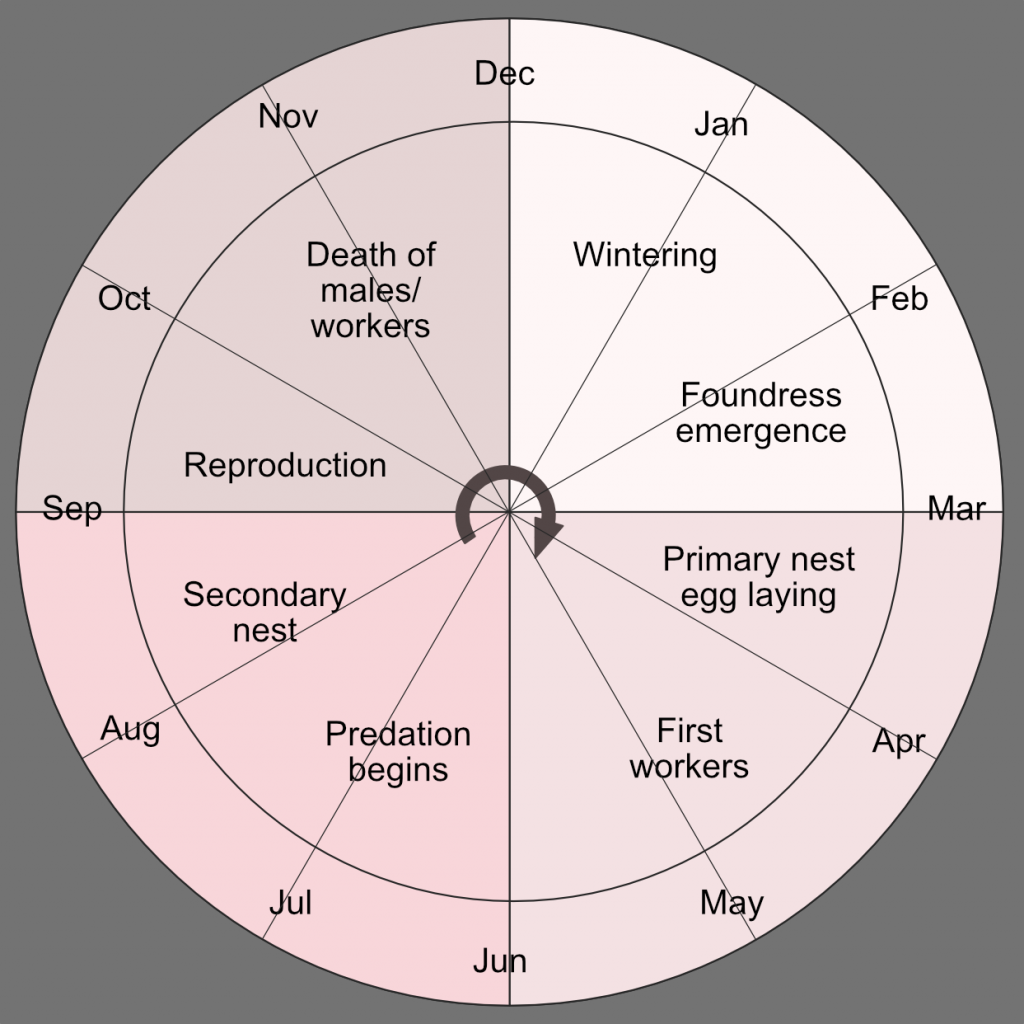
The life cycle diagram shows the development of the Asian hornet colony throughout the year. The timings are a rough guide only, as the variable UK climate will affect the development of the colony. More details can be found on the Asian hornet page of this website.
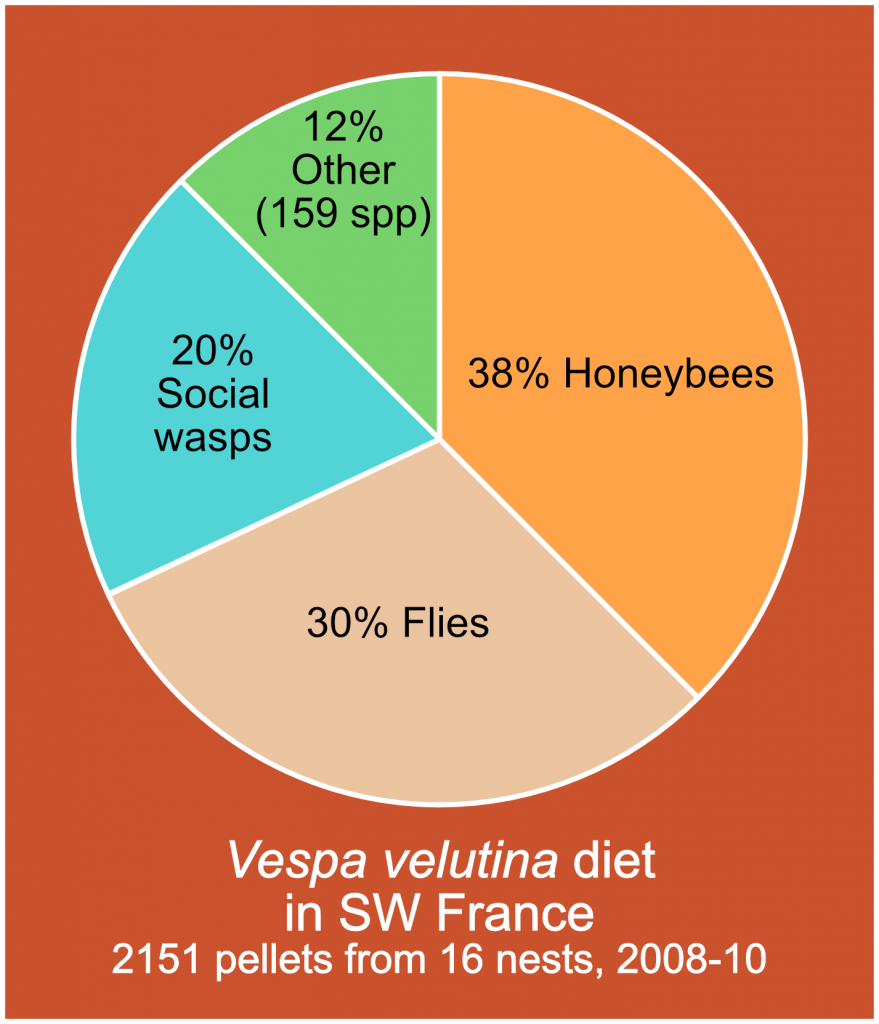
What do Asian hornets eat?
The information shown in the pie chart is based on a French study carried out in 2008-2010, and should be taken as an indication of possible predation in the UK. Asian hornets represent a serious threat to honeybees and other pollinators.
Asian hornets will ‘hawk’ in front of hives or near sites where insects forage e.g., near ivy in the autumn. Smearing the ivy with Sutera or other hornet attractant will improve the chances of attracting hornets. The hornet will grab an insect, land on a convenient branch nearby while it dismembers the insect leaving just the protein-rich thorax to take back to the nest.

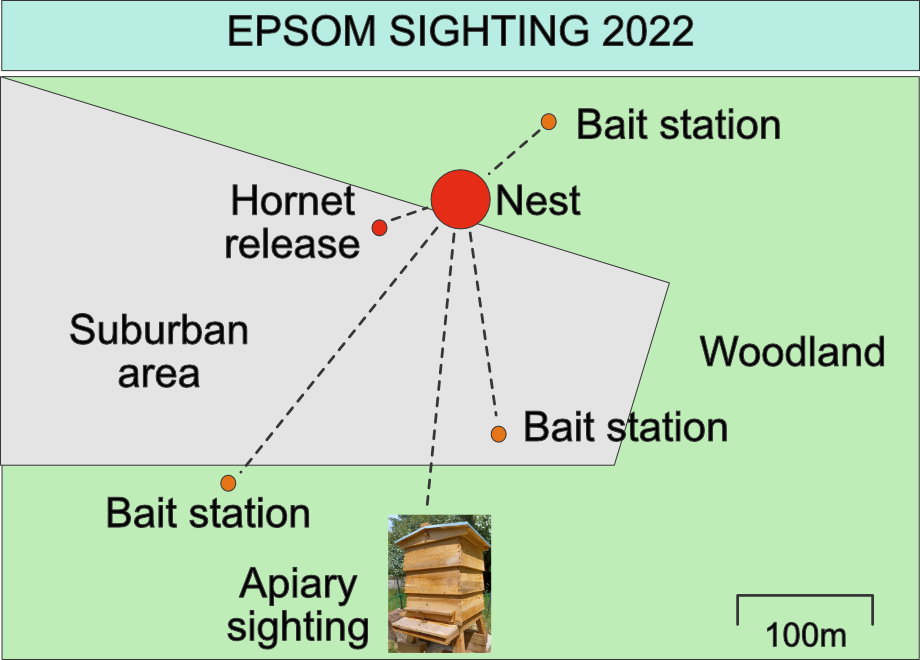
Nest location
From the experience gained to date in the UK, the nest site will be within just over a 1km radius of first sighting. As soon as a sighting is confirmed the NBU team will move into the area to set up bait stations. The local inhabitants need to be kept informed as to why bee-suited individuals are wandering round the area looking at the tree tops with binoculars. They also need to be informed of potential dangers.
By monitoring the bait stations, the direction the hornets take back to the nest site can be spotted and recorded. The time taken to return to the bait station also gives some indication of the distance to the nest. By cross referencing this information an approximate location will be indicated. The final step is to locate the nest visually.
Asian hornets are said to nest high in the tree tops but there are many contradictions to this advice. When searching for nests it is best to assume they could be at any height from ground level to tree top.
Each year there are thousands of false reports of Asian hornet sightings. Stephen urged us to use the Asian hornet app and ensure there is a photo of any suspect insect as it makes the job of monitoring easier.
Nest destruction and removal
Licenced specialists from FERA use a variety of methods to destroy the hornets, usually waiting until all the hornets are in the nest at night. Injecting poison into the nest from a safe distance is normally used. The nest can then be recovered and sent to the laboratory for diagnosis. This also removes the poison from the environment. On Jersey they have been experimenting with vacuum extraction of hornets from nests.
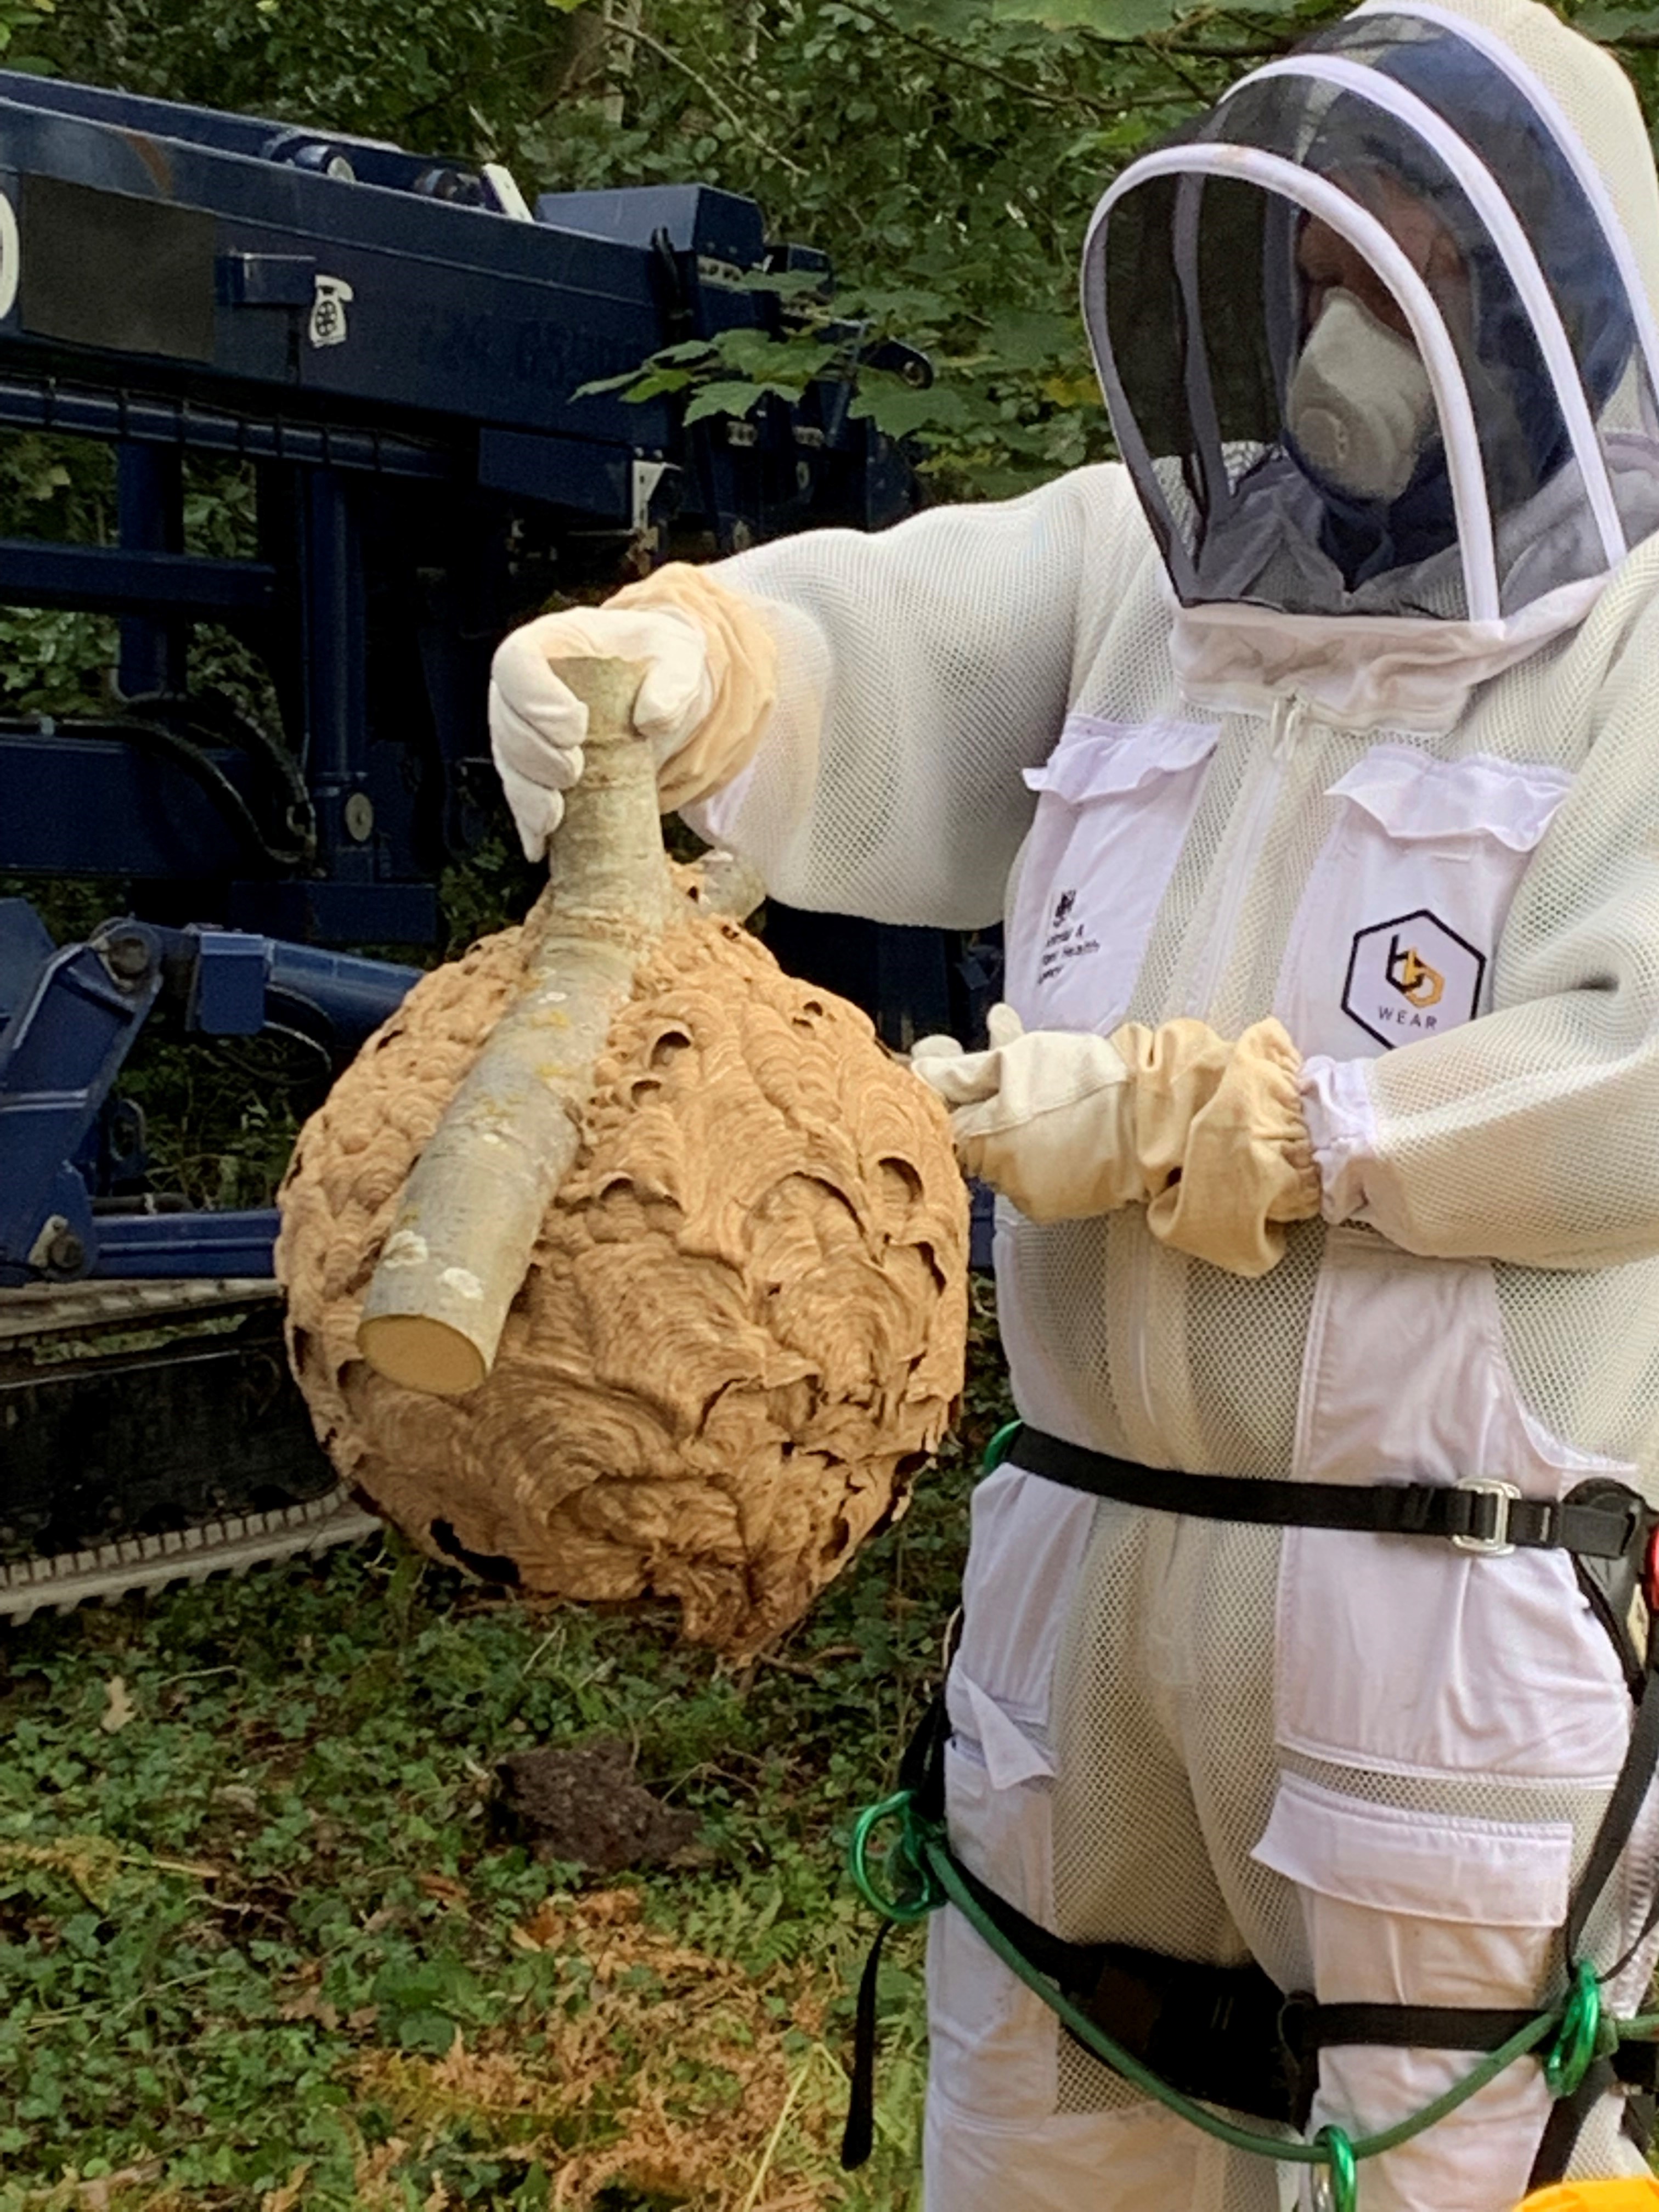
It should be noted that the exterior of an Asian hornet nest is extremely hard and durable. This may be the reason why there is no heat signature from a nest, making infra-red detection useless.
Note the sting-proof clothing! Image courtesy of Peter Davies, National Bee Unit.
Jersey experience
Stephen’s travels took him to Jersey where he experienced first hand the difficulties of dealing with the Asian hornet. The island is only 5 miles long by 9 miles wide so one might imagine it would be easy to find and destroy nests. This has not proved to be the case and Jersey currently faces the prospect of not being able to contain the infestation. The following diagram shows the four stages usually taken by an invasive species.
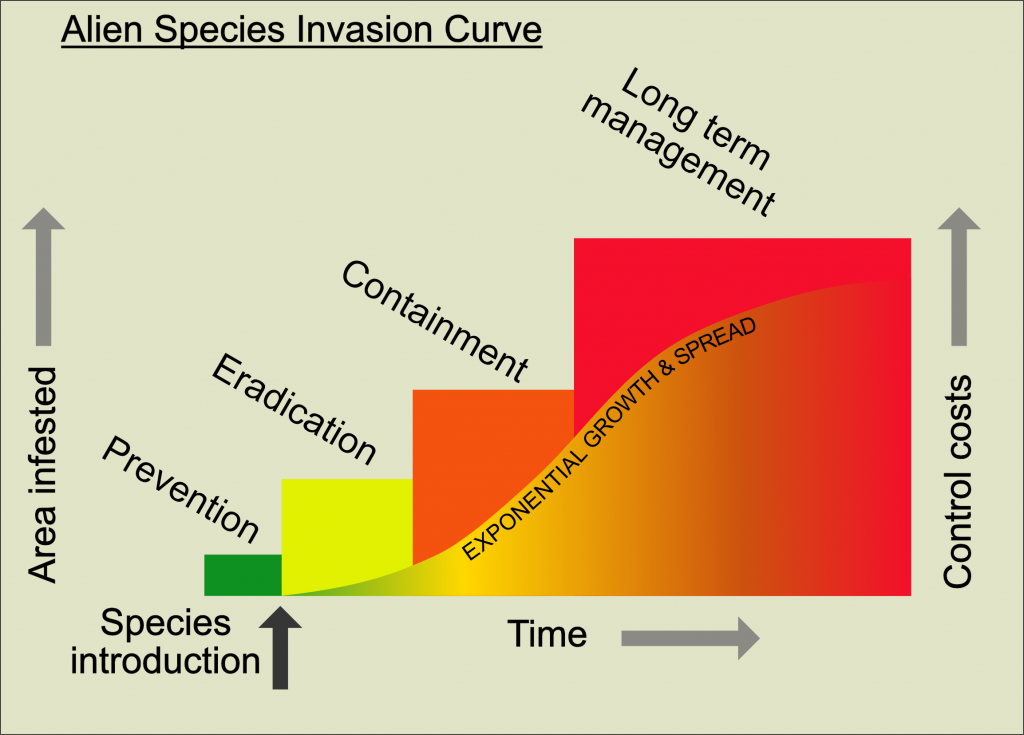
Where there is a known threat, the first step would be Prevention. In the UK this would take the form of sentinel apiaries, monitored by NBU. Confirmed sightings lead to the Eradication phase, which is where we are in the UK. When the alien species becomes established, we enter the Containment phase, with control costs rising. Finally, when Containment fails, the emphasis will be on Long Term Management. Jersey is approaching this phase as colony numbers rise (see Jersey website).
Bee defences
If the hornet becomes established in the UK, bees are more likely to show defensive behaviour. It has also been observed that some colonies exhibit ‘shimmering’ behaviour in response to Asian hornet hawking, as displayed by the giant honeybee, Apis dorsata, of southeast Asia.
Control measures
Bait traps offer an easy way for UK beekeepers to help their bees. Stephen pointed out that unintended by-catch of other pollinators was highly undesirable. This can be avoided by frequent checking of the trap. For an example of an Asian hornet bait trap see the Veto-pharma website.
There are also many other devices intended to reduce hornet predation, such as entrance guards, bats and racquets. The electric harp has some devotees, especially where the electricity can be supplied by photo voltaic cells.
We thank Stephen for a very informative talk covering all aspects of this potentially devastating threat to our bees. A timely reminder as the new beekeeping season starts!
December Social 2022
LETS SPARKLE
A Talk and Presentation at the December Social meeting 2022
Introduced by Val Bone, with Nick Silver and John Badley. 44 people attended the evening.

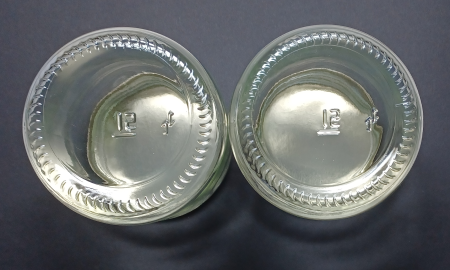
Introduction by Val Bone: Our Honey judge at Honiton Show said, ‘Show honey should sparkle’, hence the title. We aim to look at how you go that little bit further to produce honey for the Show table. Just as with livestock at the Show, the competitors spend time turning an everyday animal into a perfectly washed, groomed and polished specimen. It’s the same with honey. We have on show two perfectly good, wholesome jars of honey straight from stock, but how do you achieve that little extra to present it as ‘Show Honey’? Nick will now take you through those steps to produce the SPARKLE!
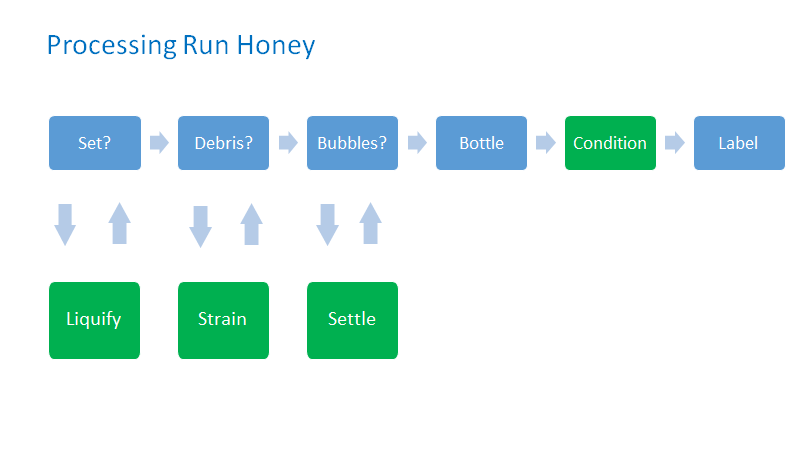
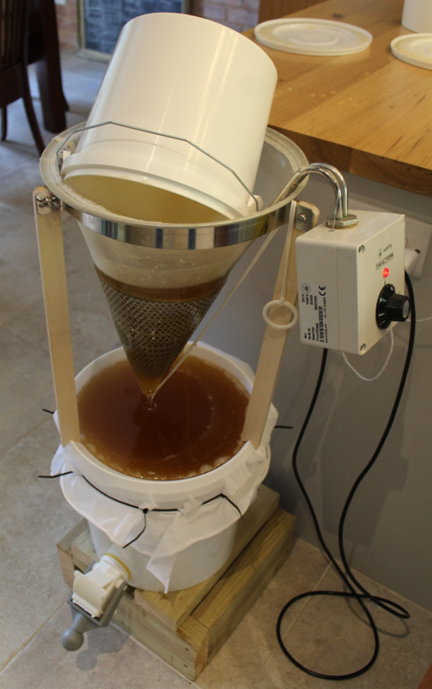
Nick. Processing Run Honey
The schematic below shows the steps necessary for processing run honey. Liquifying (if the honey is set), straining to remove debris, settling to remove bubbles and conditioning to produce the sparkle.
How much heating?
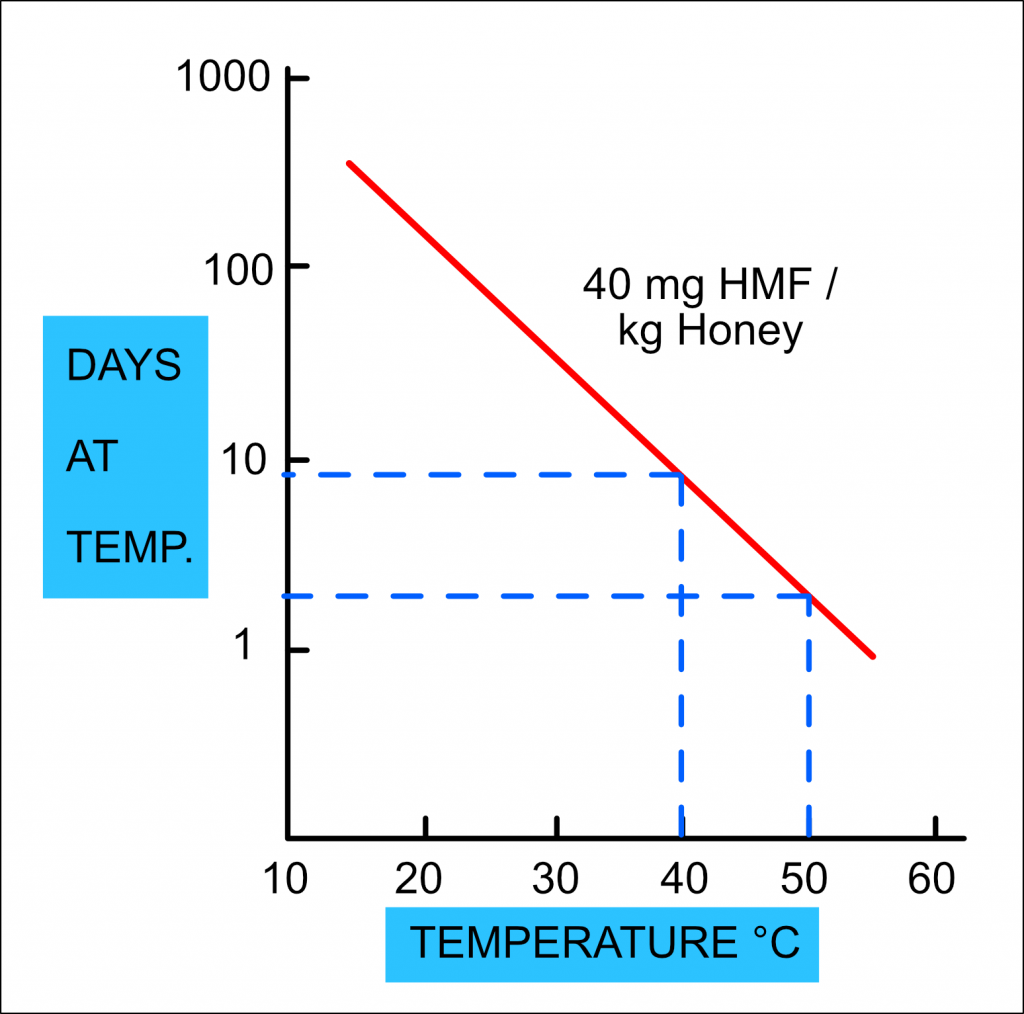
Honey subjected to heating will produce a breakdown substance called hydroxymethylfurfuraldehyde (HMF) which has a legal limit in honey of 40mg/kg honey. The graph below shows the relationship between Time and Temperature. Following the blue dashed lines, a temperature of 40°C for c9days will reach the 40mg limit, whereas a temperature of 50°C will only take 2-3 days to reach the same amount. At 60°C the safe limit is well under 1 day!
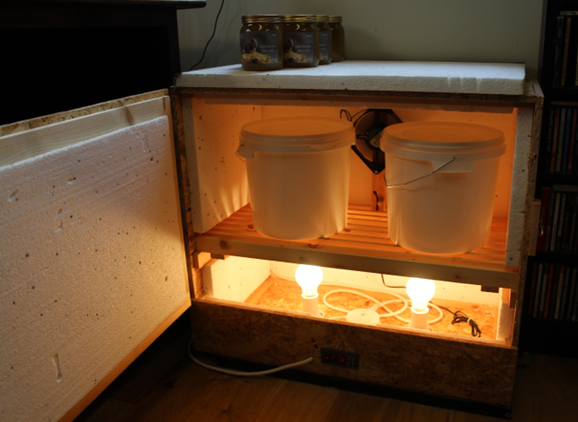
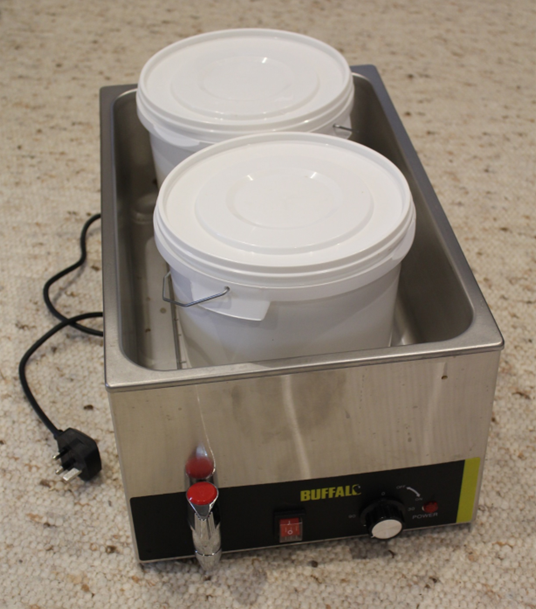
Liquify
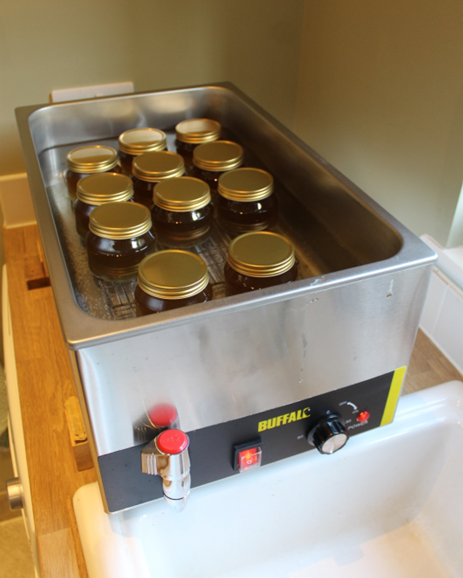
This can be achieved by either heating in a warming cabinet (below left) or a bain marie (below right). Stirring occasionally will speed up the process. Hooper suggests 52°C for 2 days. Basterfield Honey Farm suggest ‘up to 50°C’
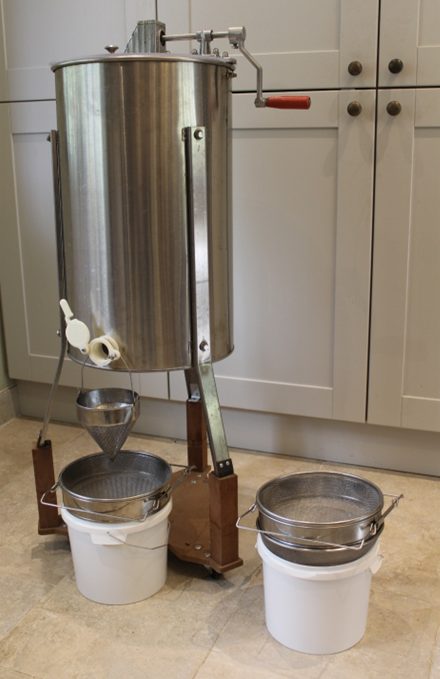
Strain
For the hobbyist beekeeper, straining immediately the honey is removed from the hive and spun from the frames is an easy option (below left). The honey is still warm so will flow through your straining system easily. Double stainless sieves recommended (coarse followed by fine) as they can be quickly washed and dried if blocking occurs.
Straining liquified honey can cause problems with sugar crystals blinding the mesh. The heated sieve (below right) is a useful piece of kit for speeding up the operation. The heated conical mesh is 350 micron, followed by a 200 micron straining cloth over the settling tank.
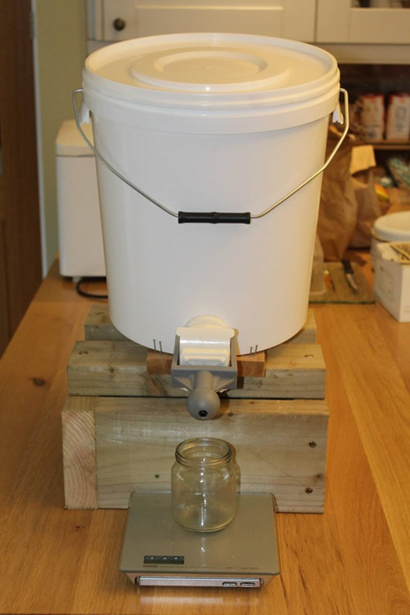
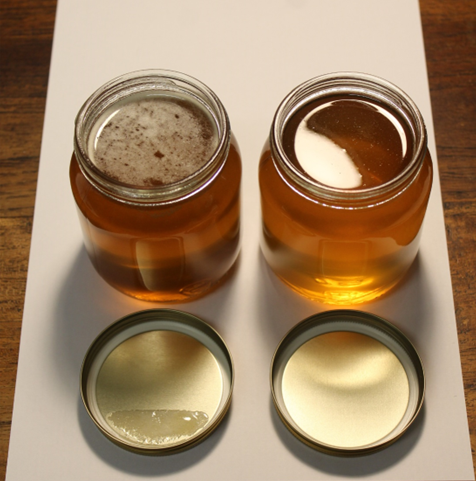
Settle
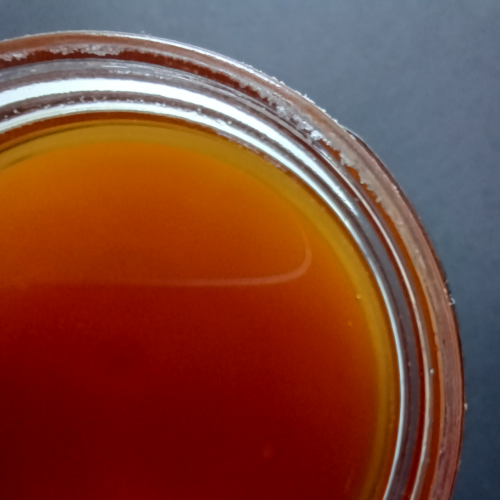
Settling allows any bubbles to rise to the top of the tank prior to bottling. Without settling your honey jars will look like the example on the left. Settling should produce sparkling honey shown on the right. Hooper suggests ’24 hours in a tall, narrow tank’.
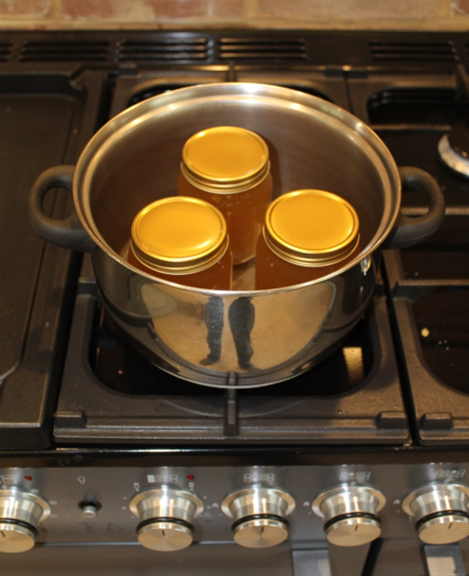
Condition
Conditioning removes all the remaining tiny crystals and will ensure clear sparkling run honey for 3-6 months. Hooper recommends 62°C for 1 hour. Basterfield Honey Farm recommend 62°C for 30 mins.
See images below. In either case, add the water to just below the lid. Jars should not sit directly on a hot metal container. Cool rapidly after heating.
John. Hints and Tips for Award-winning Honey

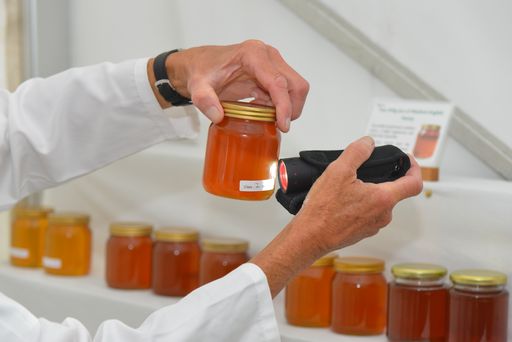
Meet our Honey Judge
Jack Mummery
BBKA Senior Judge
Checking head space aroma
What is the Judge looking for?
Read the Schedule !
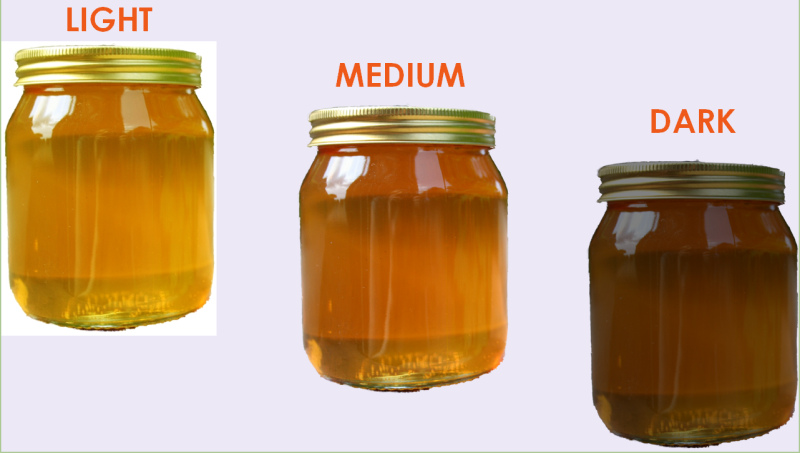
- Class 1. Two matching 454g (1 lb) jars of Light English Honey.
- Class 2. Two matching 454g (1 lb) jars of Medium English Honey.
- Class 3. Two matching 454g (1 lb) jars of Dark English Honey.
- Class 8. Six matching transparent jars of English Honey, minimum jar size 345g (12 oz), labelled as for sale…
There are also Novice Classes for honey. A novice is anyone who has NOT won a prize at any Honey Show.
- Class 16. Two 454g (1 lb) jars Light English Honey.
- Class 17. Two 454g (1 lb) jars Medium or Dark English Honey.
- Class 18. Two 454g (1 lb) jars soft set English Honey.
- Class 19. Three 454g (1 lb) matching jars of English Honey.
Honey should be:
- Free from bubbles, crystals or debris.
- All jars filled to the same level.
- Once filled, keep jars upright.
- Put lids on immediately to maximise head space aroma.
Do try this at home!
Checking for bubbles, crystals and debris.
Jars should be:
- Matching i.e., from the same batch.
- Must be spotlessly clean.
- Free of chips or damage.
- Polish the outside when on display.
Lids should be:
- Matching i.e., from the same batch.
- Must be spotlessly clean.
- No rust or scratches.
- Polish the outside when on display.
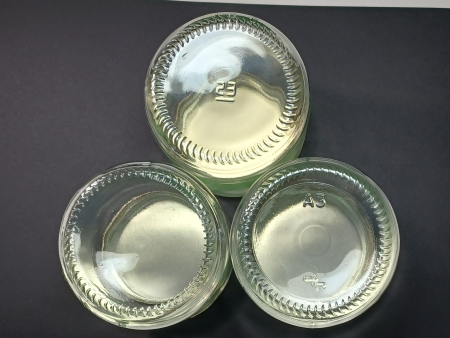
Lids must be spotlessly clean.
Some lids are manufactured with a powder on the polyurethane seal. This is what will happen if you do not wash your lids!!
The Joy of Winning!

We look forward to seeing your honey and other exhibits at the Honiton Show on August 3rd 2023!
Forage 13/10/22
‘Forage’ – a talk by Lynne Ingram NDB
Kilmington Village Hall, 13/10/22. 25 participants.
What is Forage?
The simple definition would be ‘It is a food source’. More specifically, forage for bees consists of carbohydrate rich nectar providing energy, and protein rich pollen providing food for body growth and repair.
How much does a colony need?
50-60,000 bees can consume 1800 calories per day which equates to some 300-500 lb nectar per year just to rear the workforce. In addition, the honey needed to make wax (c8lb per lb of wax) will add another 22lb of honey required per brood box. Then there are the winter stores of 40lb honey. If there is any honey left, this is the surplus for the beekeeper.
What do the bees use forage for?
The energy component fuels the metabolism of the adult bees, which includes heat production, energy for flight and wax making, plus manufacture of brood food. This larval nutrition is especially important in caste determination (queen or worker) and viral resistance. Experiments have shown that bees, especially drones, deprived of sufficient nutrition in the larval stages of growth will be less able to perform their normal functions and will be more prone to viral infections.
The pollen component provides proteins, fats, vitamins and minerals. Lynne quoted the average protein content of fresh pollen as 22.7%, but with a range of 2.5% to 62%!
Nectar
Nectar consists of carbohydrates (mainly glucose, fructose and sucrose), water, amino acids and trace elements. A nectar flow, either natural or as a result of feeding, will stimulate bees in a variety of ways.
- Queens will lay more eggs
- Young workers rear brood
- Other young workers make wax and build comb
- Older workers forage for pollen
There is also a feedback mechanism whereby returning foragers receive brood food, the quality of which determines what they forage on next.
Pollinators and Plants – a Win : Win Relationship
Bees need Plants – bees only collect four products: pollen, nectar, propolis and water. These are all derived from plants, except water.
Plants need Bees – cross pollination aided by bees and other insects is more efficient than wind pollination. Plants have evolved many mechanisms to help bees find the nectar and pollen rewards for their pollination services.
Foraging Strategies
Bees are generalists in that they will feed on a wide variety of plants, which ever gives the best return for their efforts. Honey bees in particular are well suited to this task as the colony has lots of bees with excellent communication and good memory in order to optimise foraging efficiency. A case in point would be the timing of foraging to coincide with time of day that plants provide nectar.
Plant Bee Communication
Bees are attracted to flowering plants by colour in the visible spectrum and the ultra violet range, scent, nectar guides and temperature (infrared).
Once pollinated, plants will indicate they are no longer producing nectar by colour change (horse chestnut – yellow to pink) or drooping of foliage (white clover). These changes signal the bees ‘Don’t waste your time here’.
Important Forage Locations
It is well known that the acreage of wild flower meadows has been reduced drastically over the last 70 years, but there is hope that this may be partially reversed if new agricultural policies change attitudes. Gardens, parks and road verges are also undergoing a slow process of change for the better as people and authorities begin to understand the ecology of their area of responsibility.
Native tree planting schemes abound and are responsible for millions of new trees all over the country. These are long term projects, but wildlife benefits will be seen well within 10 years as habitats improve. Planting bee-friendly shrubs in gardens and hedges is another way to attract more wildlife.
Lynne showed experimental results that demonstrated the efficiency of nectar collection from compact plants such as fruit trees compared to wild flower meadows. She also presented lists of trees suitable for bees and butterflies throughout the year. Many of these plants can be found on the East Devon Beekeepers website ‘Plants and Bees’ page. It is interesting to note that a ‘Top Ten Plants for Bees’ list shown by Lynne has trees as 4 out of the 10 plants.
Willow ※ Dandelion ※ Orchard fruit ※ Borage ※ Cherry ※ Bramble ※ White clover ※ Lime ※ Rosebay willowherb ※ Michaelmas daisy
Important Forage Families
Lynne gave eight examples of plant families which are very useful to honeybees and other pollinators. They are listed below, each with an illustration of a bee-friendly plant from that family.
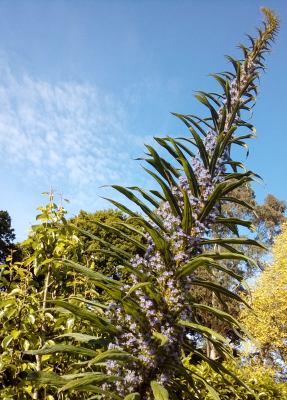
Boraginaceae – borage family
Example Echium pininana, giant viper’s bugloss.
Family also includes borage.
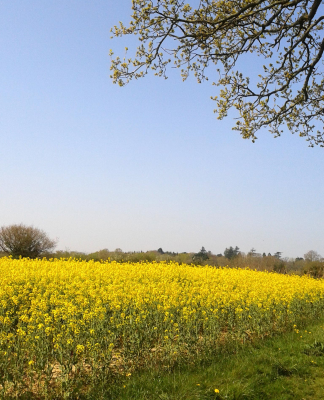
Brassicaceae – cabbage family
Example oil seed rape, Brassica napus.
Family also includes wild cabbage and charlock.
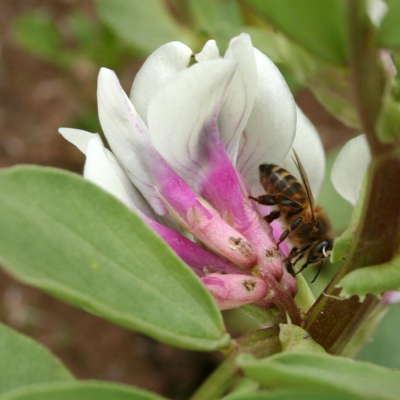
Fabaceae – bean family
Example field bean, Vicia faba.
Field beans also have extra floral nectaries on the underside of the stipules, producing copious quantities of nectar.
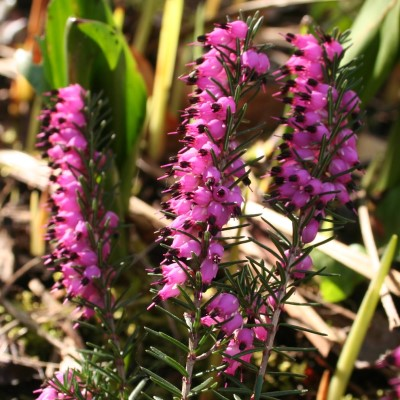
Ericaceae – heather family
Example winter heather, Erica carnea.
Family also includes Pieris, Rhododendron and Calluna
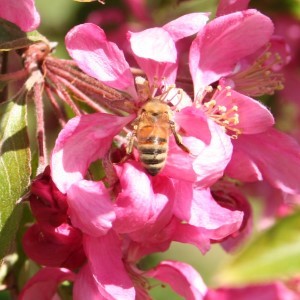
Rosaceae – rose family
Example Malus floribunda, the Japanese crab apple.
Family also includes Cotoneaster, apples, pears and roses.
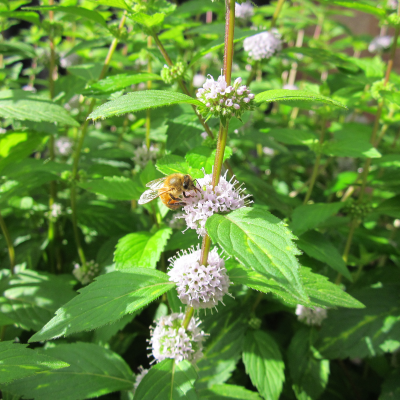
Lamiaceae – mint family
Example mint, Mentha spp.
Family also includes rosemary and Salvia.
Asteraceae – aster family
Example Michaelmas daisy, Aster spp.
Family also includes Artemisia, Senecio and Helichrysum.

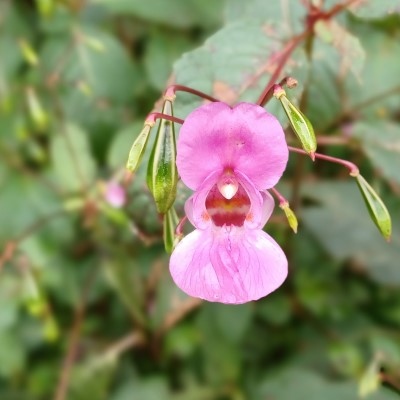
Balsaminaceae – balsam family
Example Himalayan balsam, Impatiens glandulifera.
Forage Throughout the Year
When choosing an apiary site this should be one of your major concerns. We obviously need ample forage in the warm part of the year but for bees to thrive during the cooler months, fresh pollen especially is required to build a strong and healthy population of new bees. Again, many examples can be found on the East Devon Beekeepers website ‘Plants and Bees’ page.
A 6-year study of the top 30 plants visited by bees was carried out by ‘Rosybee’ https://www.rosybee.com/research. Click the link to read about the research and results.
What Can We Do?
As beekeepers we all do our bit helping to promote the bees, but there are still lots of things we, as individuals, can do to improve the environment for bees and other pollinators. Here are a few ideas:
- Plant for all-year-round forage
- Swap grass for flowers in your garden
- Plant window boxes
- Try ‘No Mow May’ – it really works!
- Plant more bee-friendly shrubs and trees
- Try a ‘Green Roof’ on your shed (Sedum species)
- If you have room, try creating a mini wildflower meadow
Resources
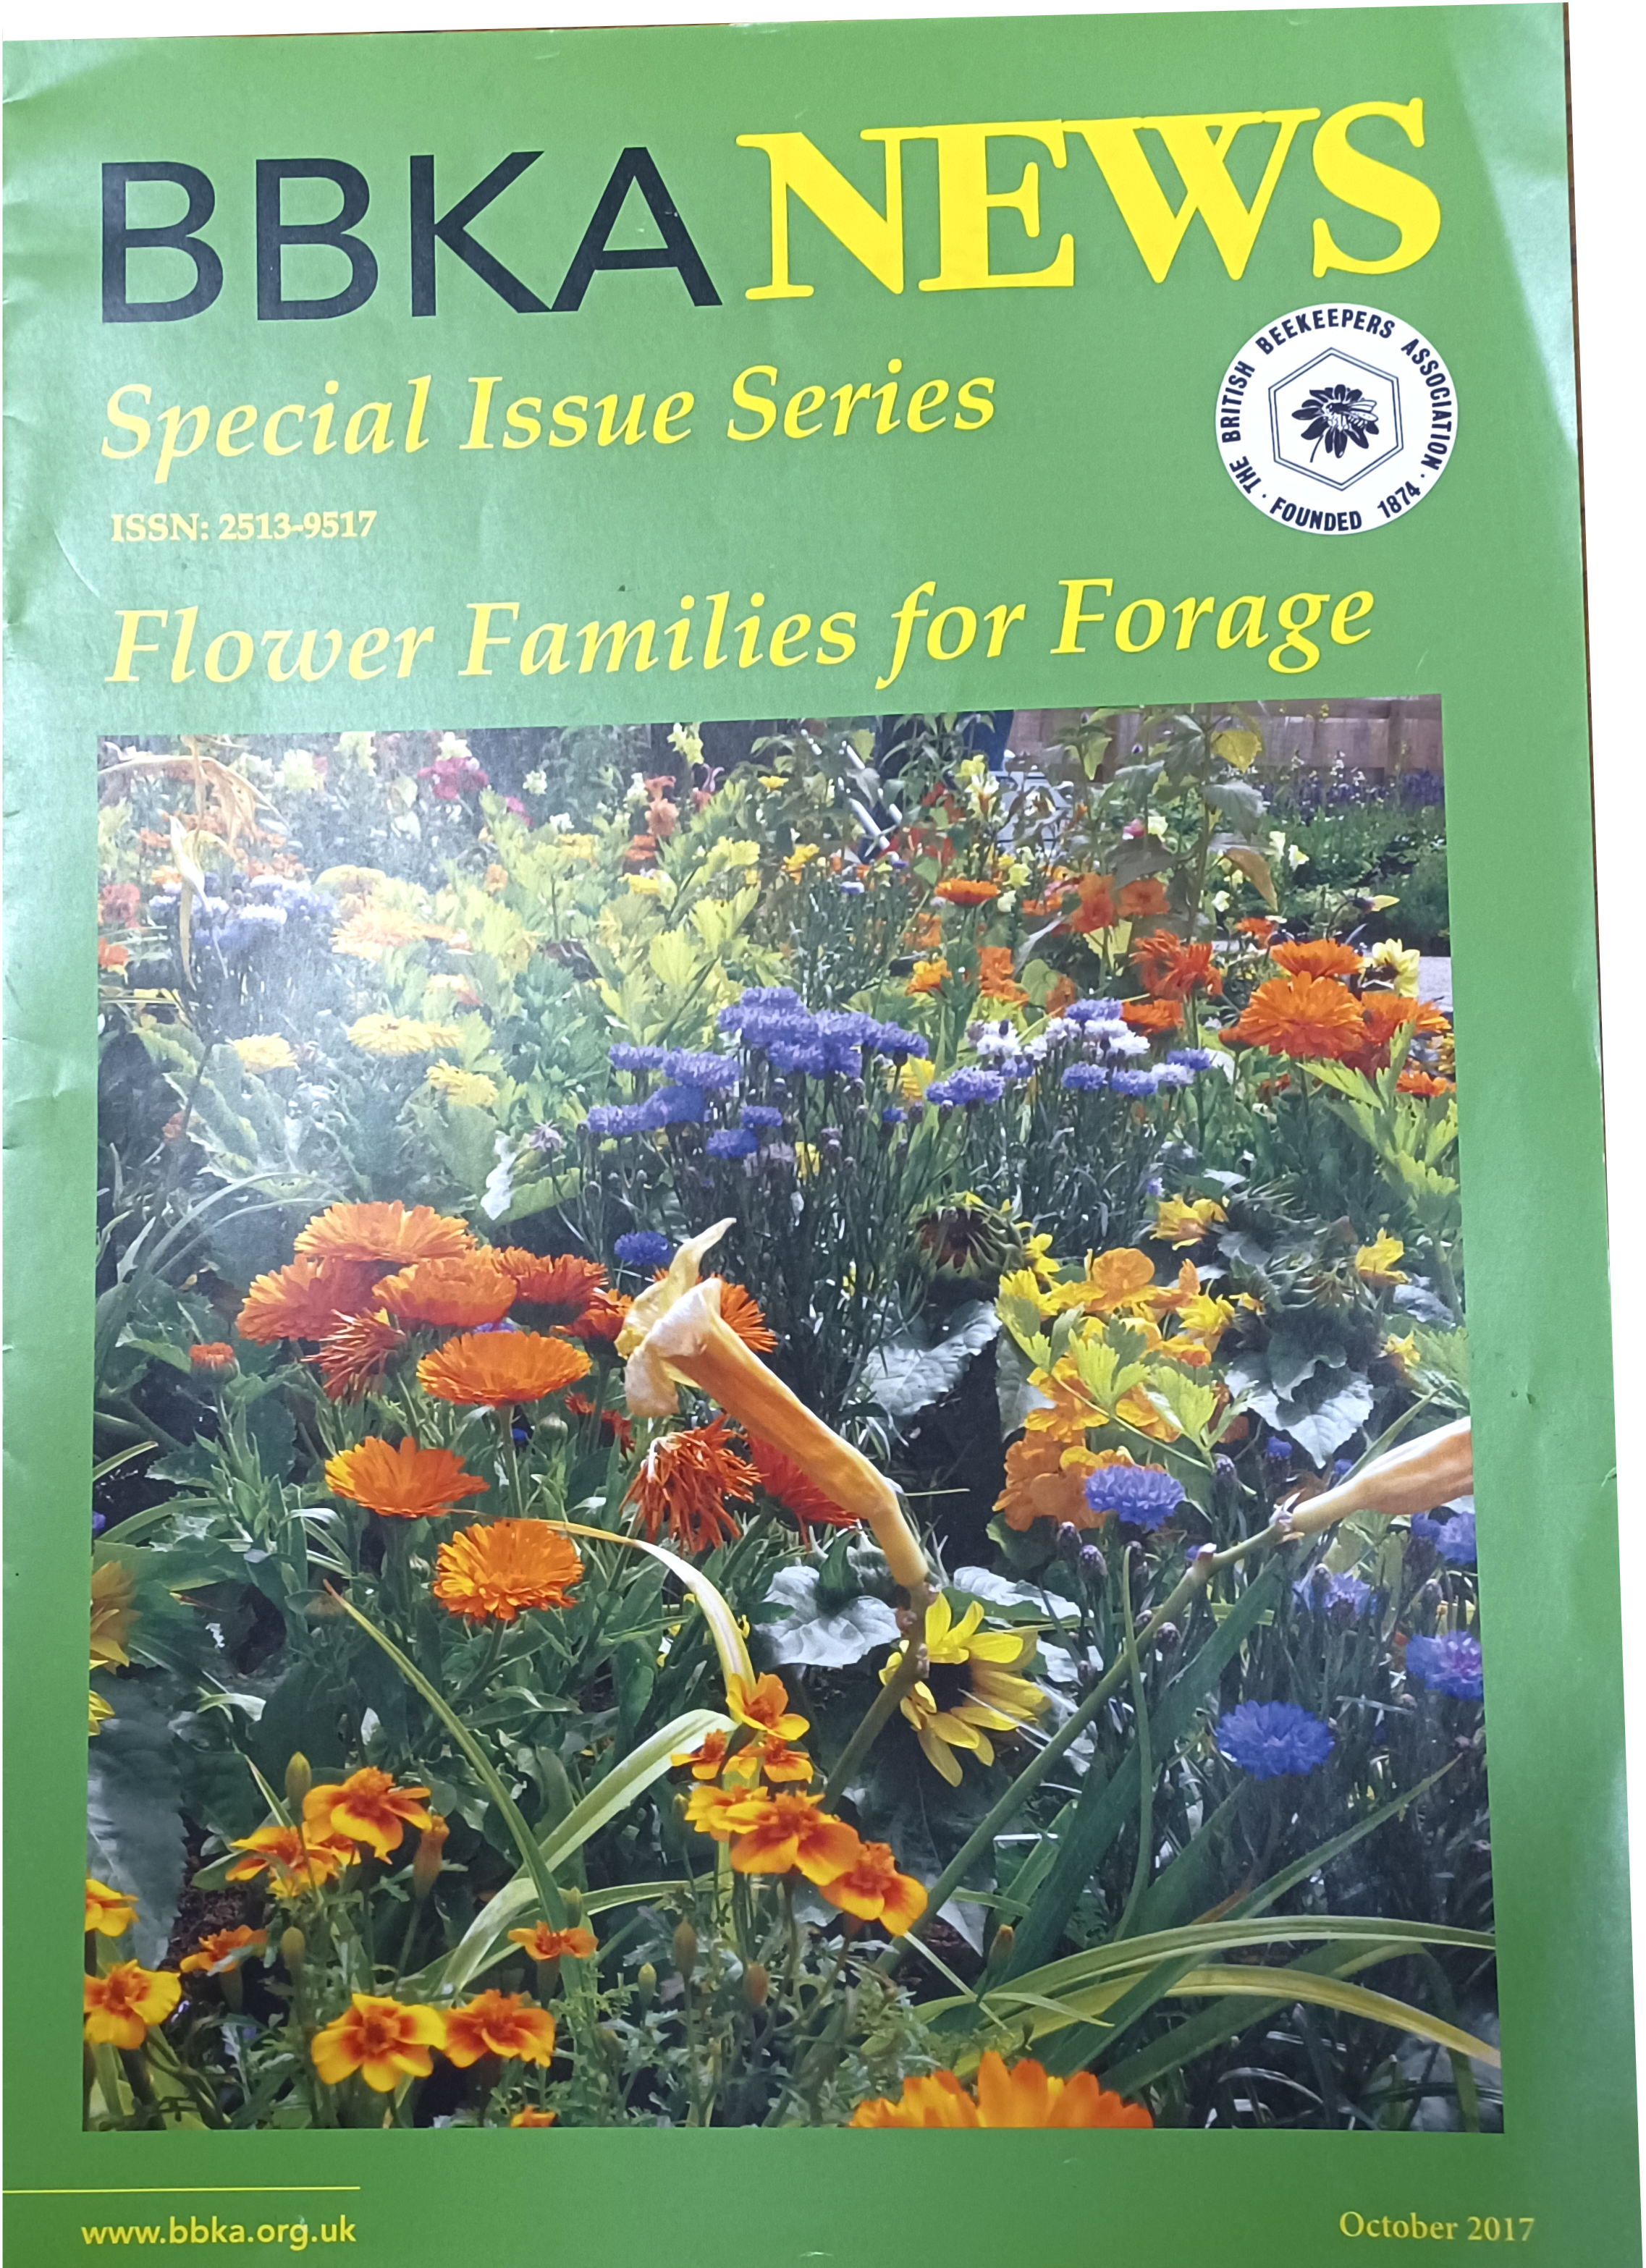
BBKA News. Special Issue Series October 2017. Flower Families for Forage.
Good Nutrition, Good Bees by David Aston and Sally Bucknall.
Plants for Bees by Kirk and Howes
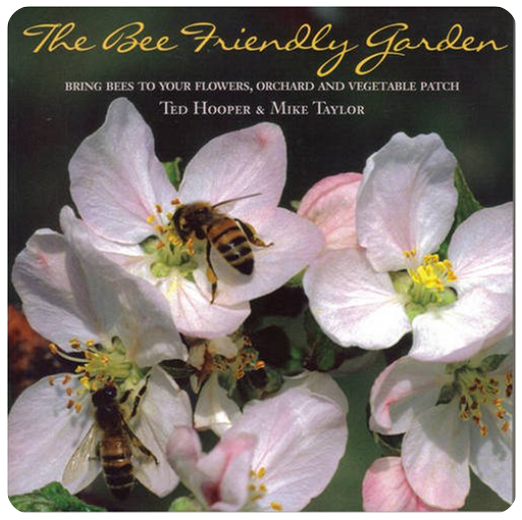
The Bee Friendly Garden – bring bees to your flowers, orchard and vegetable patch by Ted Hooper and Mike Taylor.
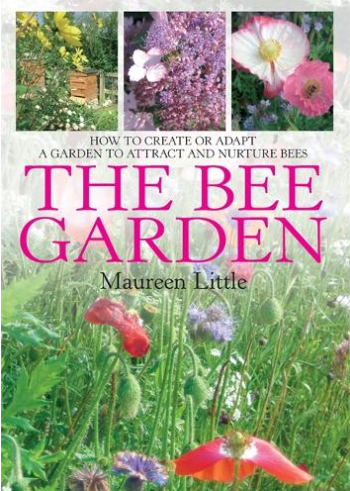
The Bee Garden – How to create or adapt a garden to attract or nurture bees by Maureen Little.
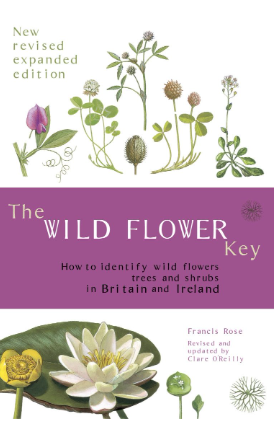
The Wild Flower Key – How to identify wild flowers trees and shrubs in Britain and Ireland by Francis Rose.

Once again, our thanks to Lynne for a well-researched and entertaining talk.
After the Honey Crop 16/07/22

A talk by Simon Foster at the Bee Shed, 16th July 2022
The honey crop is looking good, the nectar flow looks like continuing for a while, so now is the time to start thinking about ‘What happens next?
For the new beekeepers the next few weeks may be critical to the colony so here are some notes on the topics covered that should help you avoid some of the pit falls at this time of year.
First and foremost, Simon emphasised the need to check colonies for brood diseases now. The usual advice is to check twice per year, once in the spring and again at the end of the season, so now is an ideal opportunity to check, so you go into the winter with healthy bees.
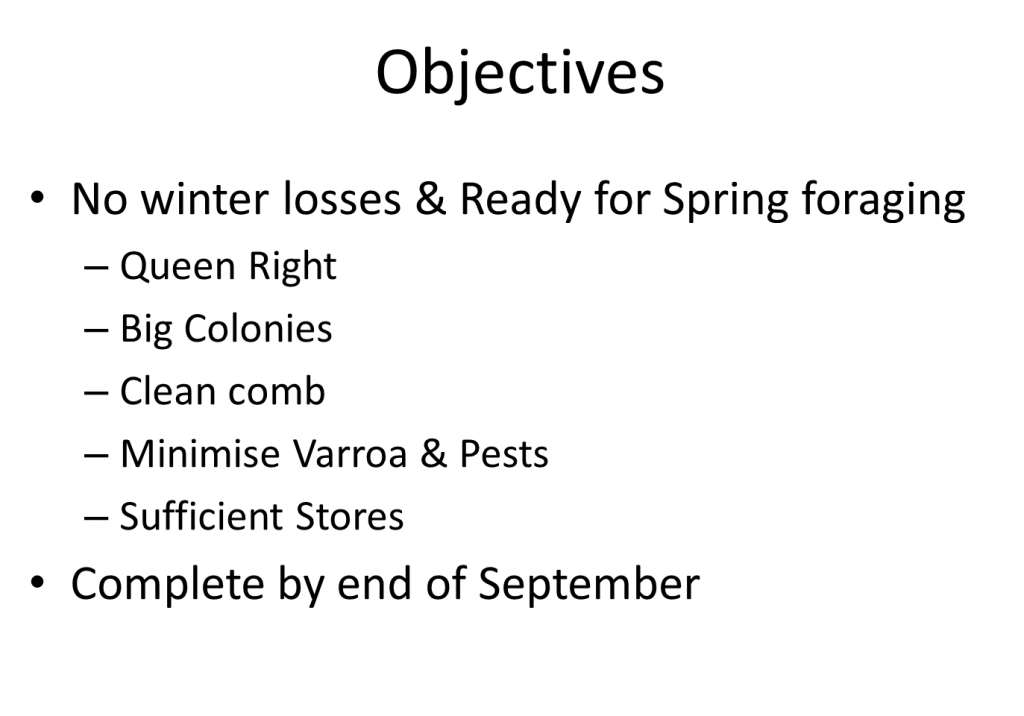
- Big Colonies survive better, whether it be the cold, wasps or diseases.
- Cold weather in October makes it difficult to process nectar & syrup.
- Old comb harbours disease; notifiable, nosema, chalk brood.
- If you have not used shook swarm or used bio-mechanical varroa control, then you will need to reduce varroa with proprietary product
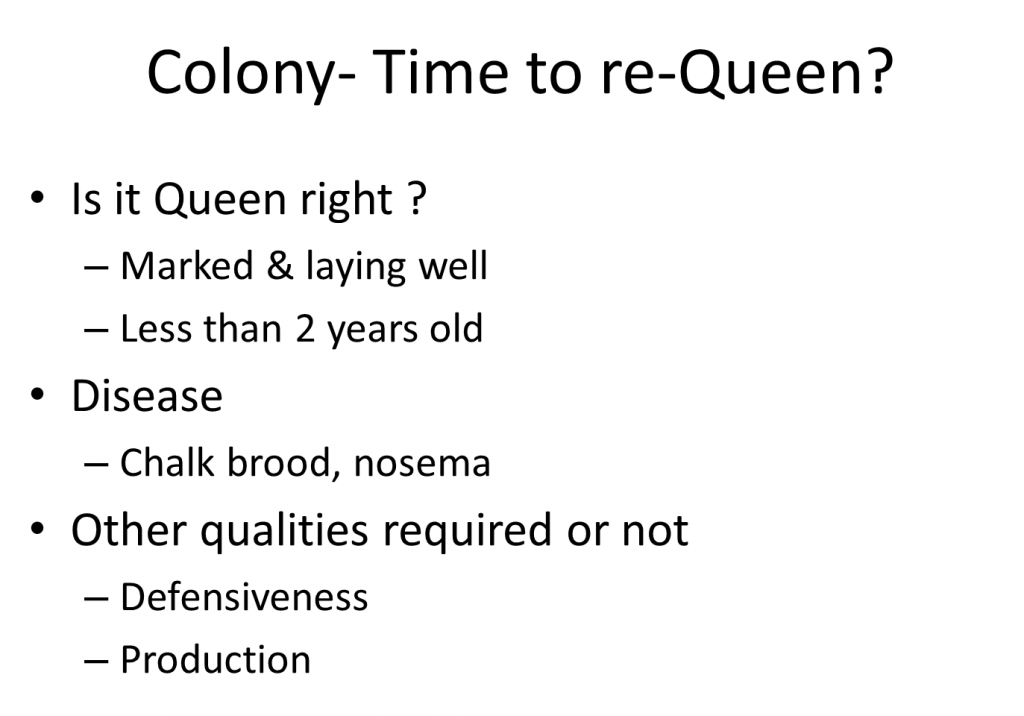
- As the colony is smaller it is easier to find Queen and mark her.
- Queens do not seem to last as they used to, so best to replace after no more than two years.
- A new queen may improve any chalk brood or nosema issues.
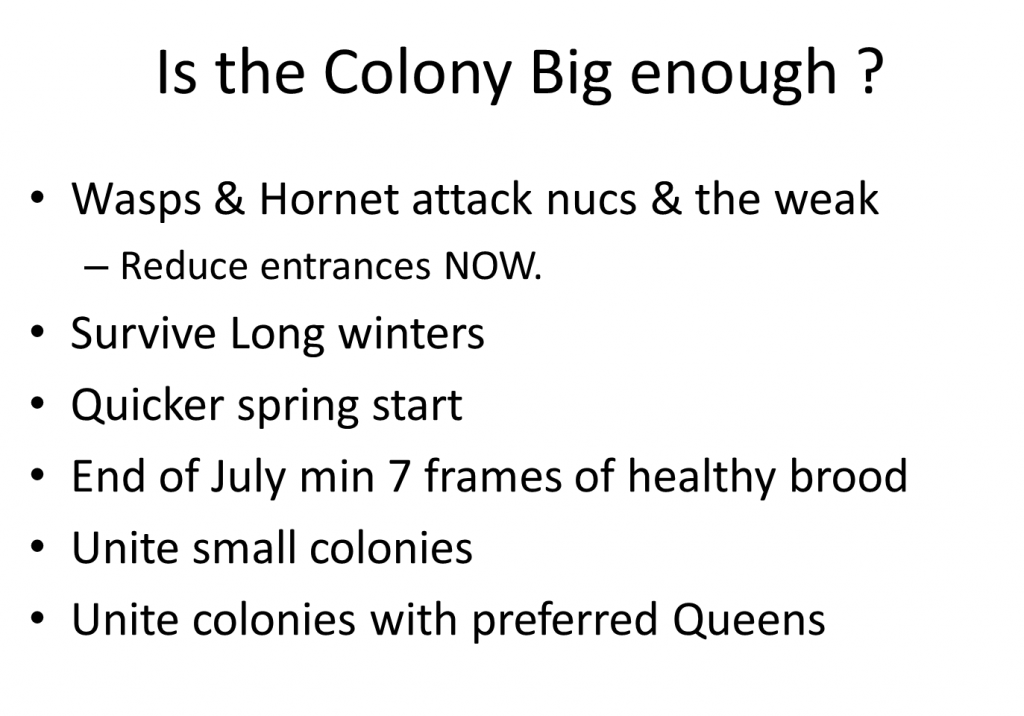
- Wasp predation has already started! Reduce entrances now.
- Small colonies and casts are unlikely to survive the winter, so unite small and weak colonies now to strong colonies with preferred queens.
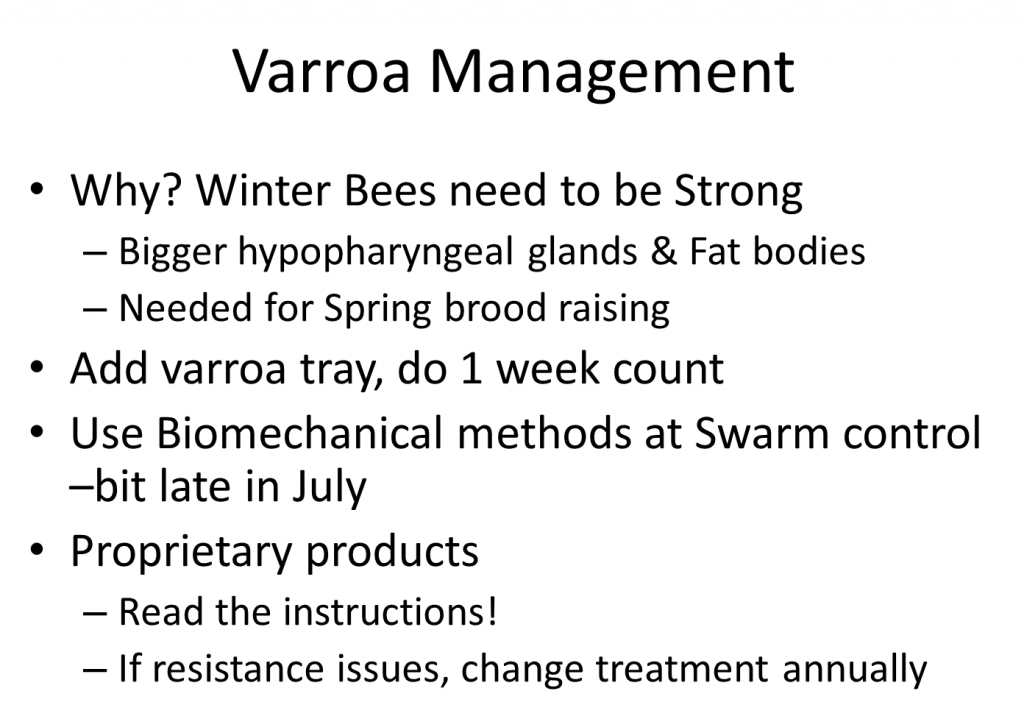
- Need to ensure winter bees are strong and long lived, so start varroa control, if needed, after the honey crop has been removed.
- Thymol and formic acid based products are temperature dependent, so read and apply the instructions.
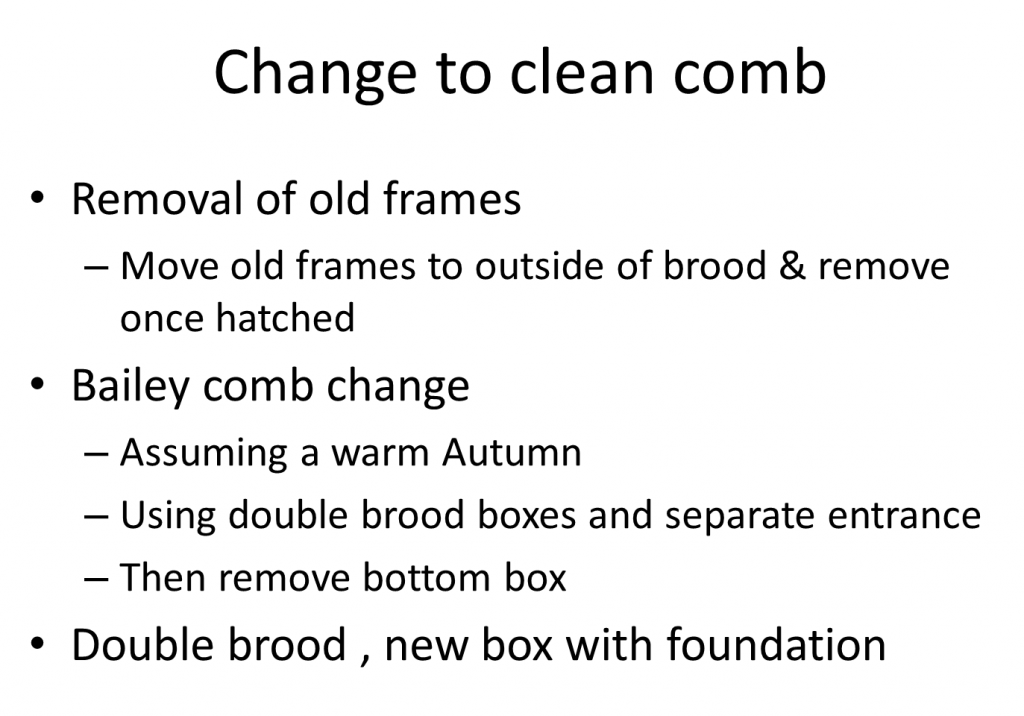
Ideally, these methods should be carried out when there is plenty of forage around. You may still have to feed if the weather turns cold. If you do not want to change the whole box at once then just replace the old frames you have moved to the outside of the brood box.
- 18kg should be sufficient, unlikely to need more in the south west, but keep checking in Feb/Mar to make sure and use some candy if necessary.
- If you use a brood and a half, put the super (eg honey crop) on the bottom, they will eat out first and not fill with brood come spring.

- It is damp that kills bees not the cold alone, so make sure your hives are ventilated, which ever configuration you use. With a solid floor, have the roof vents open and provide a little extra ventilation with matchsticks under the crown board. This is not necessary with varroa mesh floors.
- Need ventilation – 20% water in honey that needs to go somewhere as the bees consume it.
- I do wrap my hives in smooth plastic to deter woodpeckers.
Queen rearing 26/06/22
Queen Rearing Basics
Notes from Improvers meeting held at the Bee Shed on Sunday 26th June 2022. First off, we studied the basics of queen rearing, followed by an explanation of the Cupkit/Jenter method of queen rearing. An apiary demonstration followed, as the breeder queen was restricted in the cup cage. Participants also had the opportunity to practice ‘queen’ marking and clipping using drones from the colony.
Three queen rearing responses by worker bees.
- Swarm queen cells
- Supercedure queen cells
- Emergency queen cells
We use the emergency response to rear our queens because:
- We can choose which hive the eggs/larvae come from.
- We can choose which hive the cells are reared in.
- We can choose when we carry out queen rearing.
- To some degree we can choose which drones will mate with the new queen.
The Basic Requirements are:
- Choose the eggs or one day old larvae from your ‘best’ hive(s) (the breeder queen colony).
- Rear your queen cells in a strong colony, (the cell builder colony), with lots of young bees, lots of honey and lots of pollen.
- The cell raiser should be queenless OR the queen should be separated from the cell raising part of the hive.
Why one day old larvae?
- Because the best queens are produced from very young larvae.
- Larva should be the size of a comma on the printed page.
- Using a larva over two days old, the queen will be inferior or useless because she does not get enough of the high protein, high carbohydrate royal jelly to switch the hormone system to produce a sexually mature female bee.
How do the worker bees choose which cells to develop?
Queen cells have to hang down:
- On a vertical comb we can use the edge (Miller method).
- On a horizontal comb the cells are vertical (Hopkins method).
- On a vertical comb we can remove the lower cell walls so the workers have space to build a long cell downwards (Ben Harden method).
Simple Experiment: Cut out a small piece of comb with eggs, scrape away excess cells and place horizontally over a super with a gap of approximately 3cm. Why might this produce queen cells?
The Cupkit or Jenter method of queen rearing
Cupkit (aka Nicot after the name of the French manufacturer) and Jenter are two differnt manufacturers of queen rearing equipment that both work on the same principal. There are other brands too.
Overview:
- The queen of your breeder colony is contained inside a box comprised of a matrix of cups sized like natural bee cells. After a few days these cups will contain eggs.
- The egg-filled cups are then inserted into plastic holders hanging vertically in a separate frame.
- This frame and eggs can then be introduced into your cell builder colony where the workers will create queen cells as the eggs hatch into larvae.
- When the queen cells are ripe, they will be ready for distribution.
The breeder colony
- Get the eggs from your best colony.
- Allow the plastic kit to acquire the hive odour for up to several weeks before placing the queen into the cage, potentially allowing the colony to draw wax and the queen to lay into adjoining cells.
- When the cups have eggs, 1-4 days, release the queen back into her native colony and transfer the egg-filled cups to the frame you prepared earlier with cup holders.
The cell builder colony
- The cup holder frame is then placed in the cell builder colony which should ideally be queenless, with no eggs or larvae from which new queens could be produced.
- The bees in the builder colony will then adopt the eggs in your plastic cells to make queens.
- When the queen cells are about 14 days old, they can be distributed to mini-nucs, standard nucs or colonies requiring re-queening. If that is inconvenient, queens can be allowed to emerge into a cell protector, a push-fit on the cell holder, where they can be fed by the workers.
Hints and Tips
Once eggs have been adopted as future queens they can be put into any strong colony for the raising period, even the (possibly bad-tempered) one you intend to re-queen. The genes will come from the breeder queen but the work of raising new queens can be provided by any colony.
As the breeder queen deposits the eggs in the plastic cell cups naturally, no grafting is required.
When transferring the egg-filled cups to the cell bar work quickly out of the sun to avoid desiccation.
If moving between apiaries the whole apparatus can be put into a nucleus box with frames of other bees from any colony to look after the eggs while in transit.
Tweezers are useful to lift out each cup and mount it on the cell bar frame.
You need good light to ensure each cell you transfer is equipped with an egg or very young larva.
As the Nicot/Cupkit or Jenter cages will accommodate many dozen cups you may wish to part-load the cage to avoid over-production of wasted eggs and cell cups.
As with all queen-rearing you need a strict timetable for each stage and the final placement of the outputs, with kit and colonies ready to take their part. Gestation and development periods are inflexible once begun.
Once you have got your kit, stick to it. While the principles governing their operation are the same, each manufacturer’s components are incompatible with others.
Miller method of Queen Rearing
You will require:
- A breeder colony.
- A cell builder colony.
- A mating nucleus or recipient colony for each queen cell.
Overview:
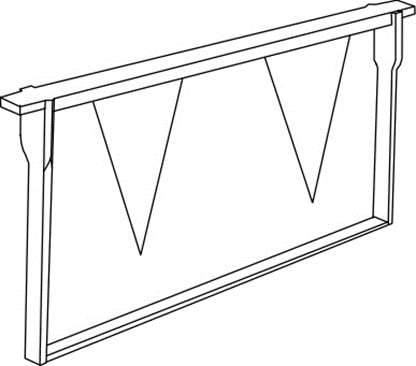
- Prepare a special frame with ‘starter’ triangles of foundation.
- Place this frame in your breeder colony.
- When this starter foundation is filled with young brood with an outer margin of eggs, trim away the eggs and place the frame in the middle of a strong colony from which the queen has been removed. In about 10 days sealed queen cells are ready to distribute.
The ‘starter’ frame and breeder colony:
- Two or three triangles of foundation are attached to the top bar with the point hanging down. Leave sufficient space all round for queen cells to be built along the free edges.
- Place the ‘starter’ frame in your breeder colony. In order to avoid the frame being filled with drone brood it may be necessary to temporarily remove all but two of the frames of brood and place the ‘starter’ frame between them.
The cell builder colony:
- The cell builder colony should be queenless and ideally with no eggs or larvae that are young enough to be converted into queen cells.
- With a sharp knife trim the ‘starter’ strips back to one day old larvae.
- Place the frame in the middle of the cell builder colony. After 10 days the queen cells will be sealed and ready for distribution to re-queen other colonies or make up mating nuclei.
Hopkins method of Queen Rearing
You will require:
- A breeder colony.
- A cell builder colony.
- A mating nucleus or recipient colony for each queen cell.
Overview:
- Take a frame of eggs or newly hatched larvae from your selected breeder colony.
- Give this frame to a queenless cell builder colony, placed horizontally above the brood nest.
- The nurse bees will realise they are queenless and will be stimulated to feed these larvae with copious quantities of royal jelly and convert them from worker larvae to queen larvae.
Getting the eggs/young larvae:
- Remove a frame from the centre of the breeder colony brood nest and replace it with a clean drawn comb that the breeder queen can lay into.
- Leave for 3-4 days or until you have sufficient small larvae, preferably one day old larvae.
- Brush off the bees and prepare the surface of the best side. For each row of eggs/larvae that you wish to retain, the three rows either side should be destroyed to the midrib. Then on each retained row remove two cells and leave the third intact. Spacing the eggs/larvae out in this way avoids closely bunched queen cells that are difficult to separate without damage.
Preparing the cell builder colony:
- The cell builder colony should be queenless and ideally with no eggs or larvae that are young enough to be converted into queen cells.
- Place the prepared frame over the brood nest horizontally, prepared face down, resting on a frame or blocks to leave 3-4cm between comb surface and top bars of frames below.
- Place an eke over the frame, replace crown board (some people put a cloth under the board to stop draughts) and replace the roof.
- The queen cells should be cut out two days before hatching (day 14 from newly laid egg, or approximately 10 days after setting up the frame in the cell builder). The cells can be placed in colonies needing re-queening or into mating nuclei.
Ben Harden method of Queen Rearing
You will require:
- A breeder colony, preferably with one or two supers.
- A second brood box.
- A mating nucleus or recipient colony for each queen cell.
Overview:
- Two frames with eggs/one day old larvae are removed from the brood box of the breeder colony and are placed above the supers in the spare brood box together with four other frames of pollen and honey.
- The space in the top brood box is filled with suitable material to stop wild comb building.
- Because of the separation from the queen the nurse bees will behave as if they are queenless and will be stimulated to feed these larvae with copious quantities of royal jelly and convert them from worker larvae to queen larvae.
- After 7 days the queen cells can be removed. The two frames with brood can be swapped for two fresh ones from below to repeat the cycle throughout the season.
Setting up the combined breeder/cell builder colony:
- Remove the two frames with eggs/larvae from the breeder colony brood nest MAKING SURE THE QUEEN IS NOT ON EITHER OF THEM.
- Close the gaps and add fresh comb to the outside. Rebuild the hive with queen excluder and supers.
- Make up the top box with six frames. The two brood frames in the centre, pollen frames either side and honey frames on the outside. Fill the empty space. Replace crown board and roof.
Manipulating the queen rearing colony:
- Every seven days throughout the season transfer two frames with suitable eggs/young larvae from the bottom to the top, and two empty frames to the bottom, having checked for and removed the queen cells.
- Always find the queen first before removing frames.
- Always ensure there are adequate amounts of pollen and honey in the top box.
Variation on this theme:
In order to improve the likelihood of queen cells being produced, select a one day old larva and carefully remove the cell walls below it. Also clear other cells below the selected cell for 3-4cm. Repeat this operation spacing the selected cells across the comb.
Queen Rearing Basics Part 2
Having produced your queen cells you will need a colony to place them in, where the emerging queens are free to mate.
Mating nucleus colonies:
- Normally 3-6 frames.
- Require frame(s) of brood, frame(s) of pollen, frame(s) of stores, space to expand.
- The nucleus will have one ‘ripe’ queen cell introduced from your cell builder colony.
- The nucleus should preferably be in a good mating area.
Methods of cutting out and installing ‘ripe’ queen cells:
- Drawing pin, paper clip, foundation wire, etc.
- Aluminium foil.
Mini-nucs:
Ron Brown, a Devon Beekeeper, used them a lot.
Procedure for Filling Mini-nucs:
- Prepare the mini-nuc frames with foundation and install. Close the sliding entrance. Supply the mini-nuc with fondant feed.
- Place the mini-nucs upside down in an upturned hive roof. Slide the base out far enough to pour bees in.
- Shake the bees from a super frame into a washing up bowl and spray them lightly with water. Repeat with a further two frames.
- Shake the wet bees to a compact mass and carefully scoop a cup full. Immediately tip this into the upturned mini-nuc and close the base.
- Turn the mini-nuc the right way up and install the ‘ripe’ queen cell.
- Leave the mini-nuc closed in a cool, dark place for a few days. May need water spray occasionally.
- Put the nuc in the open and open the entrance slide.
You will now hopefully have about 300 bees drawing out wax comb and a ‘ripe’ queen cell that will hatch in a few days time. It is important to monitor these small hives and to maintain the supply of moisture while they are shut in. When released, never let the supply of fondant run out. There should always be sufficient to see the colony through a cold spell.
Hints and tips:
- Put a brick on the hive to stop it blowing away.
- Prop the sliding entrance open with a piece of wood otherwise the slides sometimes close by themselves with disastrous consequences.
- When the queen is mated and laying well she is ready to transfer to a bigger nuc or hive.
- If/when Asian hornets arrive in our area this type of colony will be extremely vulnerable to predation.